In a previous post I showed how to convert a local Node script into an Azure Function so that it can be called from anywhere. While that solution provides a great (and cost effective) way to call the script using HTTP, I also needed to automate the calls and add the data into a spreadsheet for reporting purposes.
This post explores how to automate the process using Power Automate. If you haven’t used Power Automate before it’s part of the Power Platform suite of tools that includes Power Platform, Power Pages, Power Virtual Agents, and Power BI.
Creating a Power Automate Flow
The final version of the automation flow I created looks like the following:
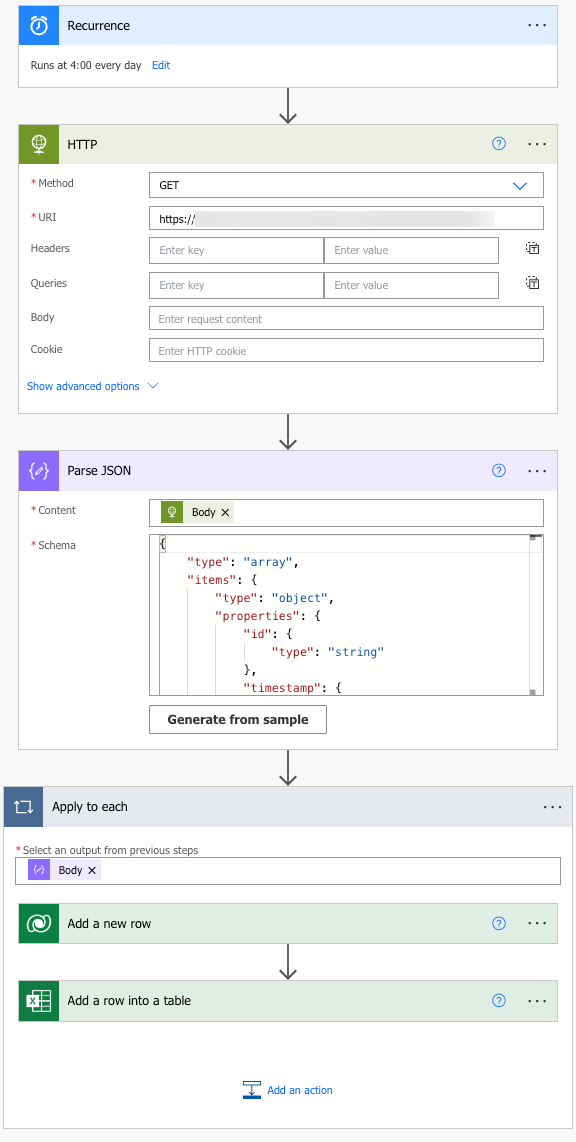
It performs the following steps:
- Schedules a task to run every day at a specific time.
- Makes an HTTP call to an Azure Function.
- Parses the JSON data returned from the function call.
- Adds each item from the JSON array to an Excel Online spreadsheet.
To get started, I performed the following steps:
- Signed in to https://make.powerautomate.com.
- Selected my “environment” in the upper-right corner of the screen. You may have multiple environments to choose from if you’re using a work account.
- Selected the Create item in the left menu.
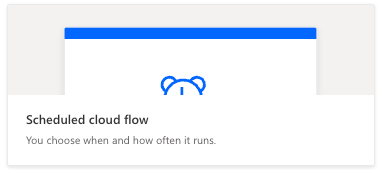
From there I chose Scheduled cloud flow from the available templates:
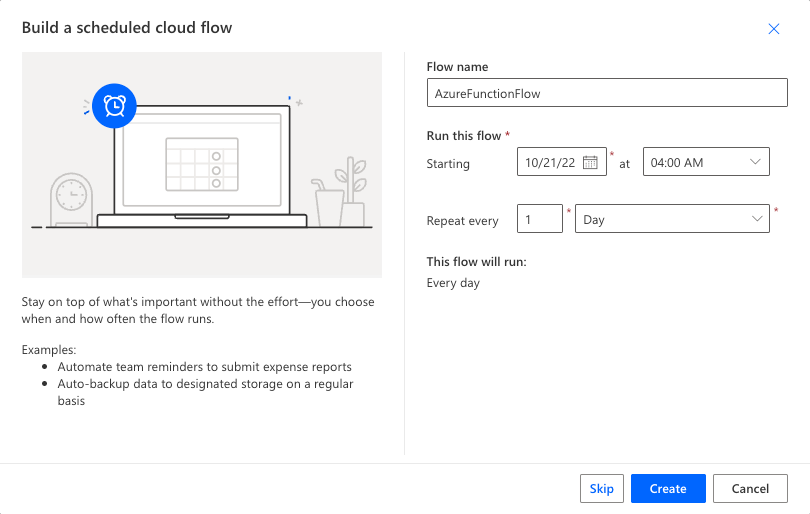
In the dialog that appeared I named my flow, defined how often it would run, and then selected the Create button.
Adding an HTTP Action
After selecting the Create button, Power Automate automatically added the first step of the flow for me. Since I told it to run every day at a specific time, it configured that information for me:

The next step in the flow involves calling the Azure Function to retrieve the data needed for reporting. To make that happen, I clicked the Next step button and typed “http” into the search box. I then selected the HTTP action from the options.
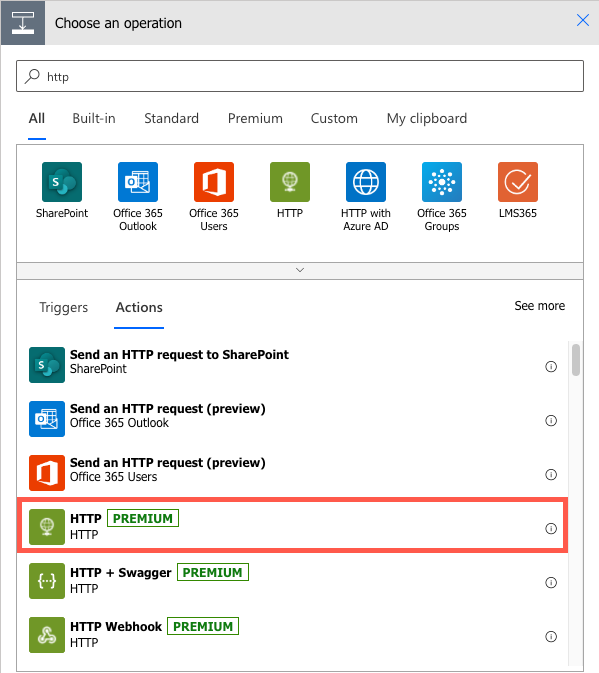
NOTE: The HTTP action is a “premium” feature and requires the proper license. While licensing is beyond the scope of this post, you can find more details in this document.
After selecting the HTTP action, you can enter the method and URI that should be used for the API call. My scenario was quite simple:
- Method: GET
- URI: https://<my-azure-function-domain>/api/getGitHubRepoStats
The Azure Function for my HTTP call didn’t require authentication (it has publicly available data) so no authentication was needed. Nice and simple. It also didn’t require any specialized headers or queries. In cases where you have to do something more involved, you can learn more about the various options at https://learn.microsoft.com/en-us/power-automate/desktop-flows/actions-reference/web.
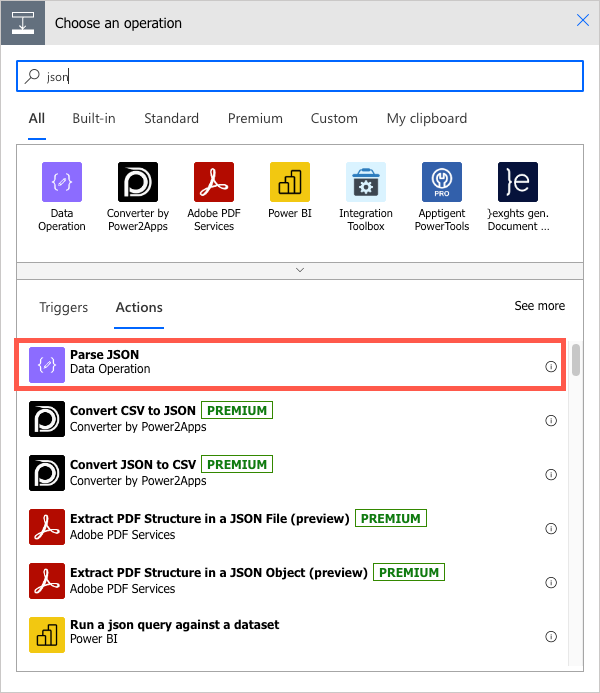
Adding the Parse JSON Action
After entering my method and URI into the HTTP action, I needed a way to access the JSON data returned from the Azure Function and parse it. To handle that I selected the New step button, searched for “json”, and selected the Parse JSON action:
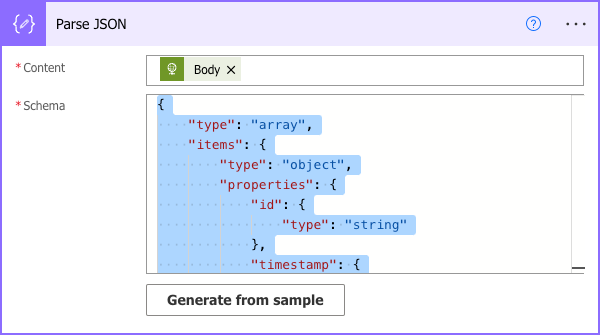
Once the Parse JSON action dialog appeared I performed the following tasks:
- Select the Content property and pick Body from the options. I want to parse the body of the message returned from the Azure Function call.
- Select the Generate from sample button and enter the JSON returned from the Azure Function call. This automatically generates a schema and adds it to the Schema property of the Parse JSON action. That’s a super nice feature as you’ll see in the next action that’s added.
Adding the Apply to each Action
Up to this point you’ve seen how to call an HTTP API and parse the JSON. The next step is to store the data somewhere which means iterating through the JSON array that’s returned from the API call. To handle that you can use the Control actions provided by Power Automate.
I selected the Next step button again, typed “apply” in the search box, and selected the Apply to each action. How did I know to select that? The first time I used Power Automate awhile back I didn’t know, so I had to resort to my favorite search engine. But, once you know about it it’s easy to find and use.
The Apply to each action dialog will ask you to select an output from the previous step. You can select Body from the Parse JSON options in this case since we want to access the JSON object. That gets us to the data we need and will iterate through each object in the array, but how do we add each object into an Excel spreadsheet or some other type of data store?
Adding a Connector
I initially wanted to store my data in something called Dataverse and added a connector to that. However, the person consuming the data wanted it in Excel, so I ended up adding a connector to Excel Online (Business) as well. To do that, I selected the Add an action option from the Apply to each action and selected Excel Online (Business) from the top options that are shown.

Next, I entered the following values:
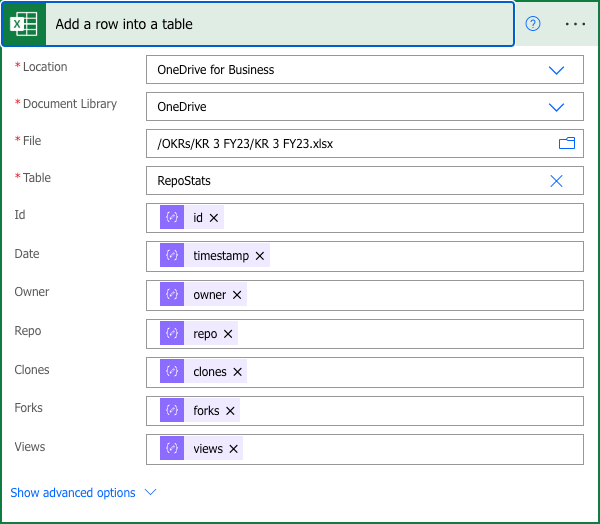
This uses OneDrive for Business so I selected a spreadsheet that I created there named KR 3 FY23.xlsx as well as the worksheet name (RepoStats in this example). The values I wanted to store from each object found in the JSON array were then picked. Because a schema was created in the previous Parse JSON step, you can pick the JSON properties you want to assign to your Excel columns for each row. That’s the beautify of having the Parse JSON action generate a schema as mentioned earlier.
Validating and Testing the Flow
All of the steps needed for my particular scenario are now defined and we’re ready to validate the flow and test it. That can be done by selecting the Flow checker (to validate) and Test (to try it out) options respectively in the upper-right toolbar:

The Flow checker will display any errors or warnings in the flow so that you can fix them. The Test option allows you to manually start the flow to try it out.

After testing it, you can go to the test run and if the flow ran successfully you’ll see a message at the top (or an error if it failed):
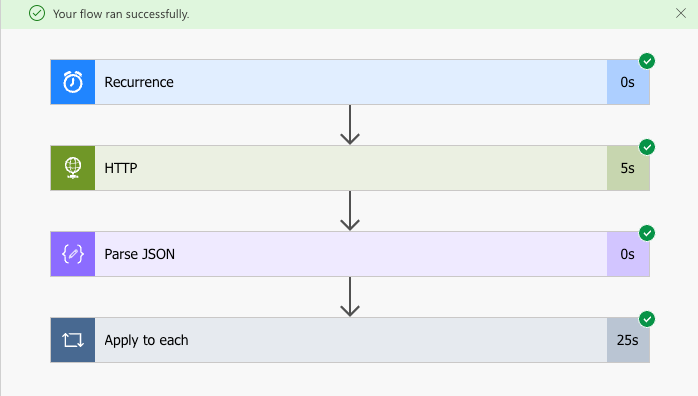
You can drill down into each action to see the what happened and the data that was involved for each action.
Once the flow was ready to go, I let it run so that the spreadsheet is updated everyday. Someone else within my organization connects to the spreadsheet and brings it into a Power BI dashboard that we can all view.
Conclusion
While I could’ve written a custom app to perform these different steps, by using Power Automate I was able to quickly schedule the functionality I needed and convert the JSON data into rows within Excel all without writing a single line of code. Although this is a fairly straightforward and arguably simple example, it still saved me a ton of time going this route. With more complex flows that time savings is multiplied and there’s the added benefit of giving other people within your organization permissions to edit the flow as well – even if they’re not a developer.
If you haven’t tried out Power Automate, create a free trial and give it a spin. There are infinite tasks that can be automated using it!