
Introduction
In this post, we’ll explore how you can get started using Azure OpenAI. We’ll take a look at setting up a resource using the Azure Portal, learn how to deploy a model, and experiment with the model in Azure OpenAI Studio.
If you’d like to see a quick overview of everything covered in this post, check out the following “getting started” video.
Getting Started with Azure OpenAI in 6-ish Minutes
https://www.youtube.com/watch?v=jQyYeYWD97I
Let’s dive right in!
Step 1: Create an Azure OpenAI Resource
Head over to the Azure Portal and locate the search bar at the top of the page. Search for Azure OpenAI, select that option, and then select Create.
Once you’ve navigated to the Create Azure OpenAI page you can choose your subscription, preferred resource group, and region, and enter a name for the resource. The pricing tier currently has only one option (that’s subject to change in the future).
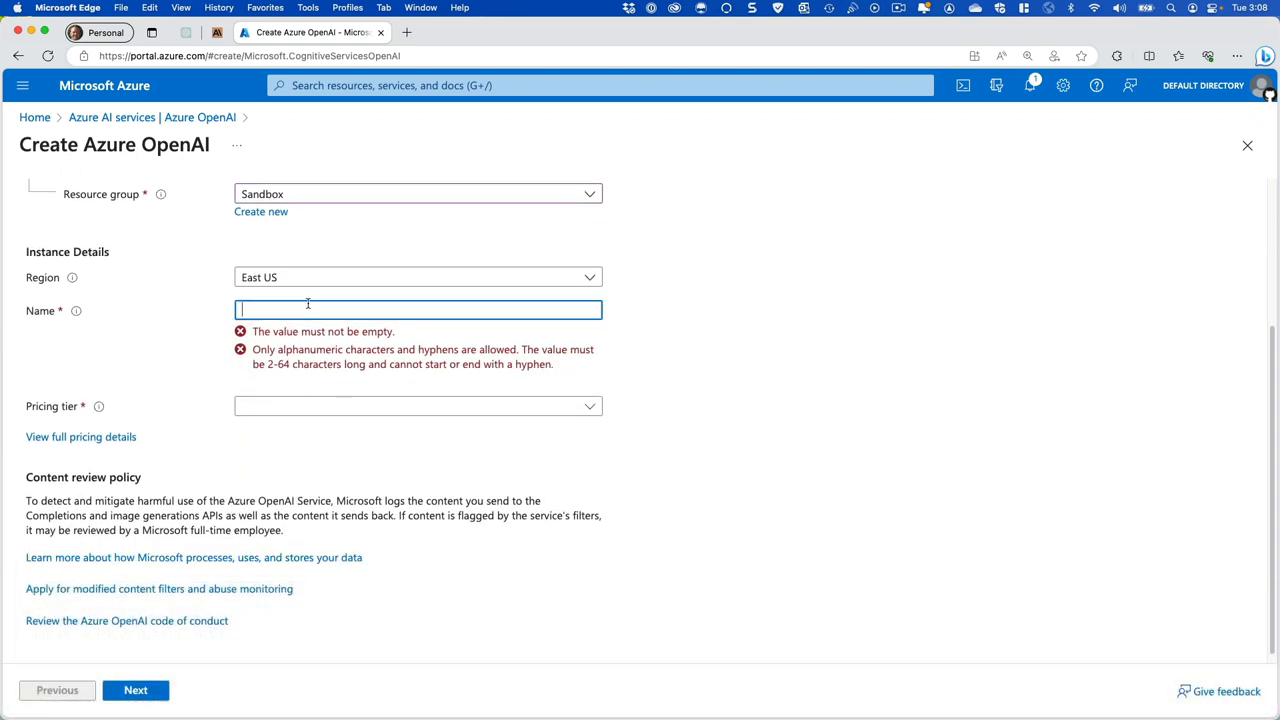
After entering the required information, select the Next button until you get to the Review + submit screen. Then select Create.
Step 2: Explore the Newly Created Azure OpenAI Resource
Once the deployment completes, you can explore the resource. In your Azure OpenAI resource Overview page you’ll find an endpoint. This is used along with a key to add Azure OpenAI capabilities to your apps.
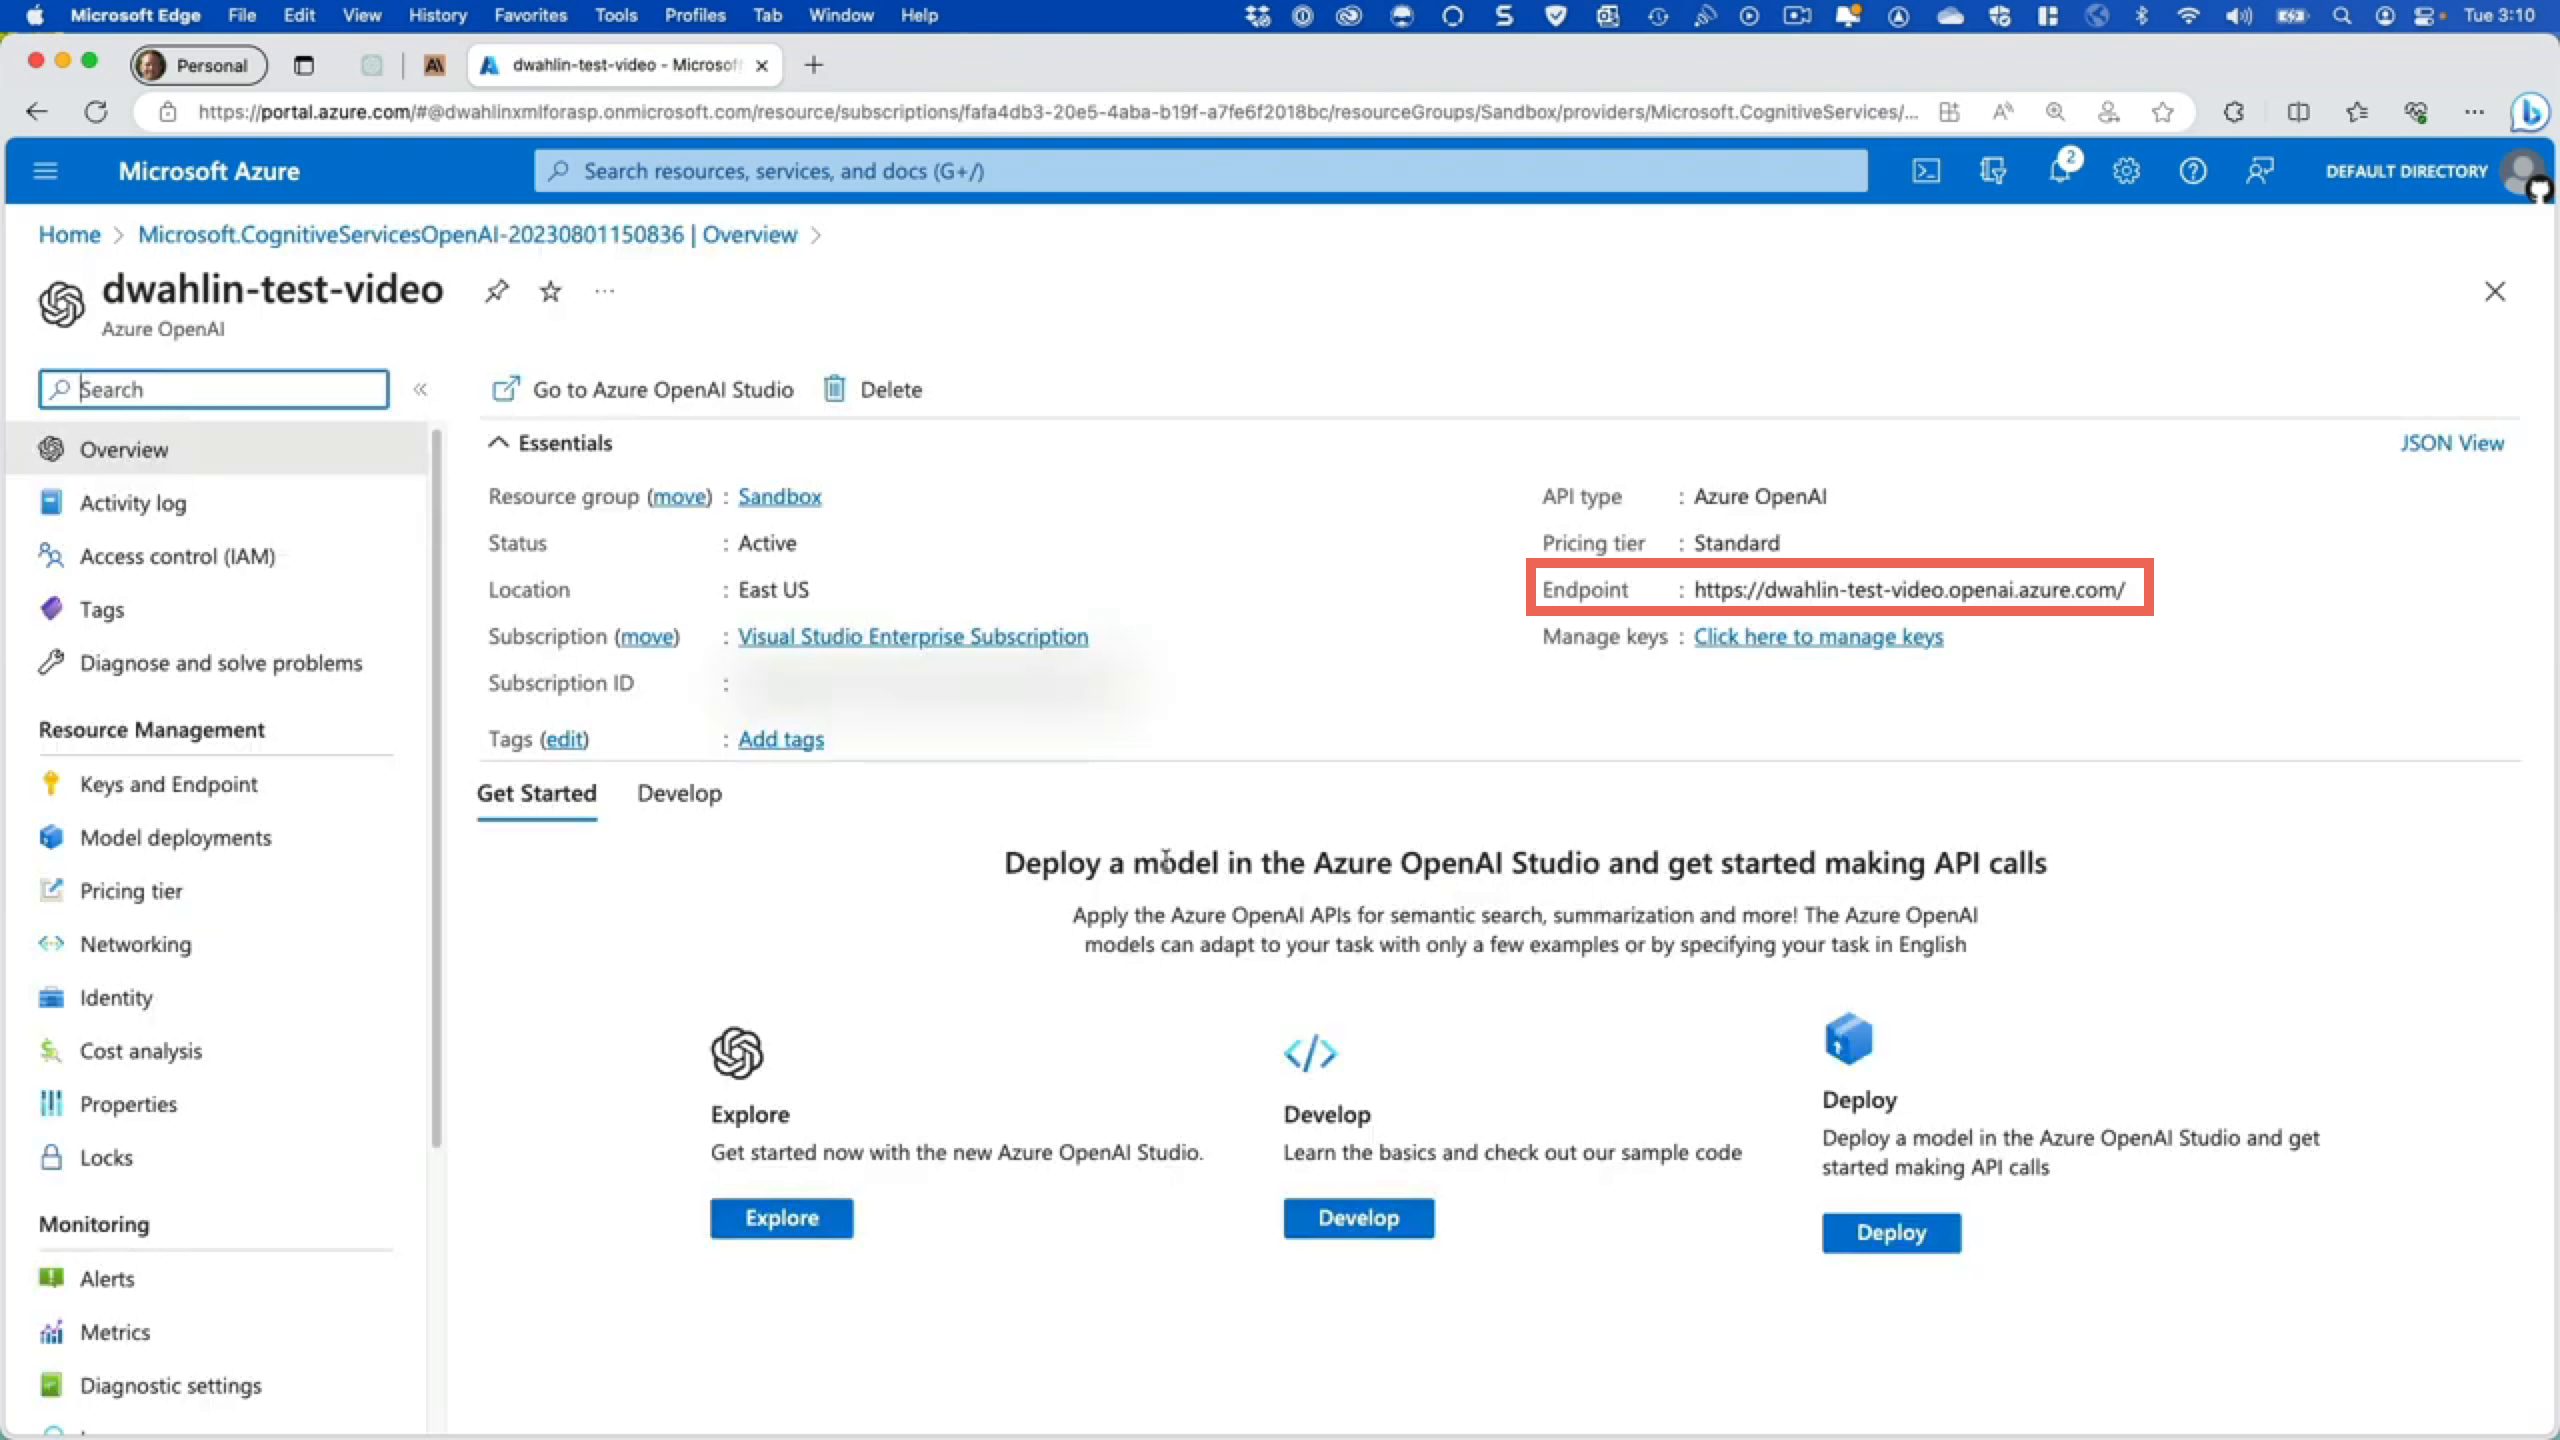
Select Resource Management —> Keys and Endpoint from the left menu and you’ll see the endpoint listed as well as your available keys. Although we won’t be using these in this tutorial, you’ll need them to integrate Azure OpenAI functionality into your custom apps as mentioned earlier.
Step 3: Explore Azure OpenAI Studio
Azure OpenAI offers various models such as GPT-3 and GPT-4 (currently you have to apply for access to GPT-4). How can you access these? Go to Resource Management —> Model deployments and select Manage Deployments. This will open Azure OpenAI Studio.
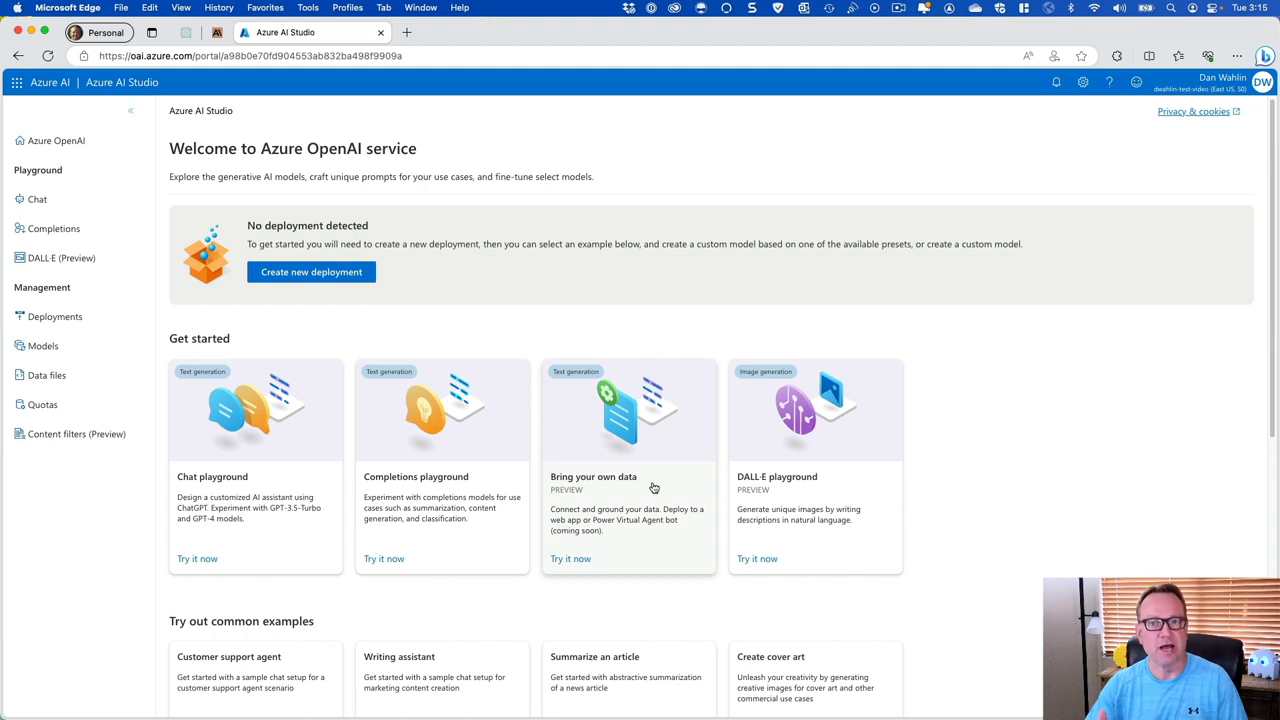
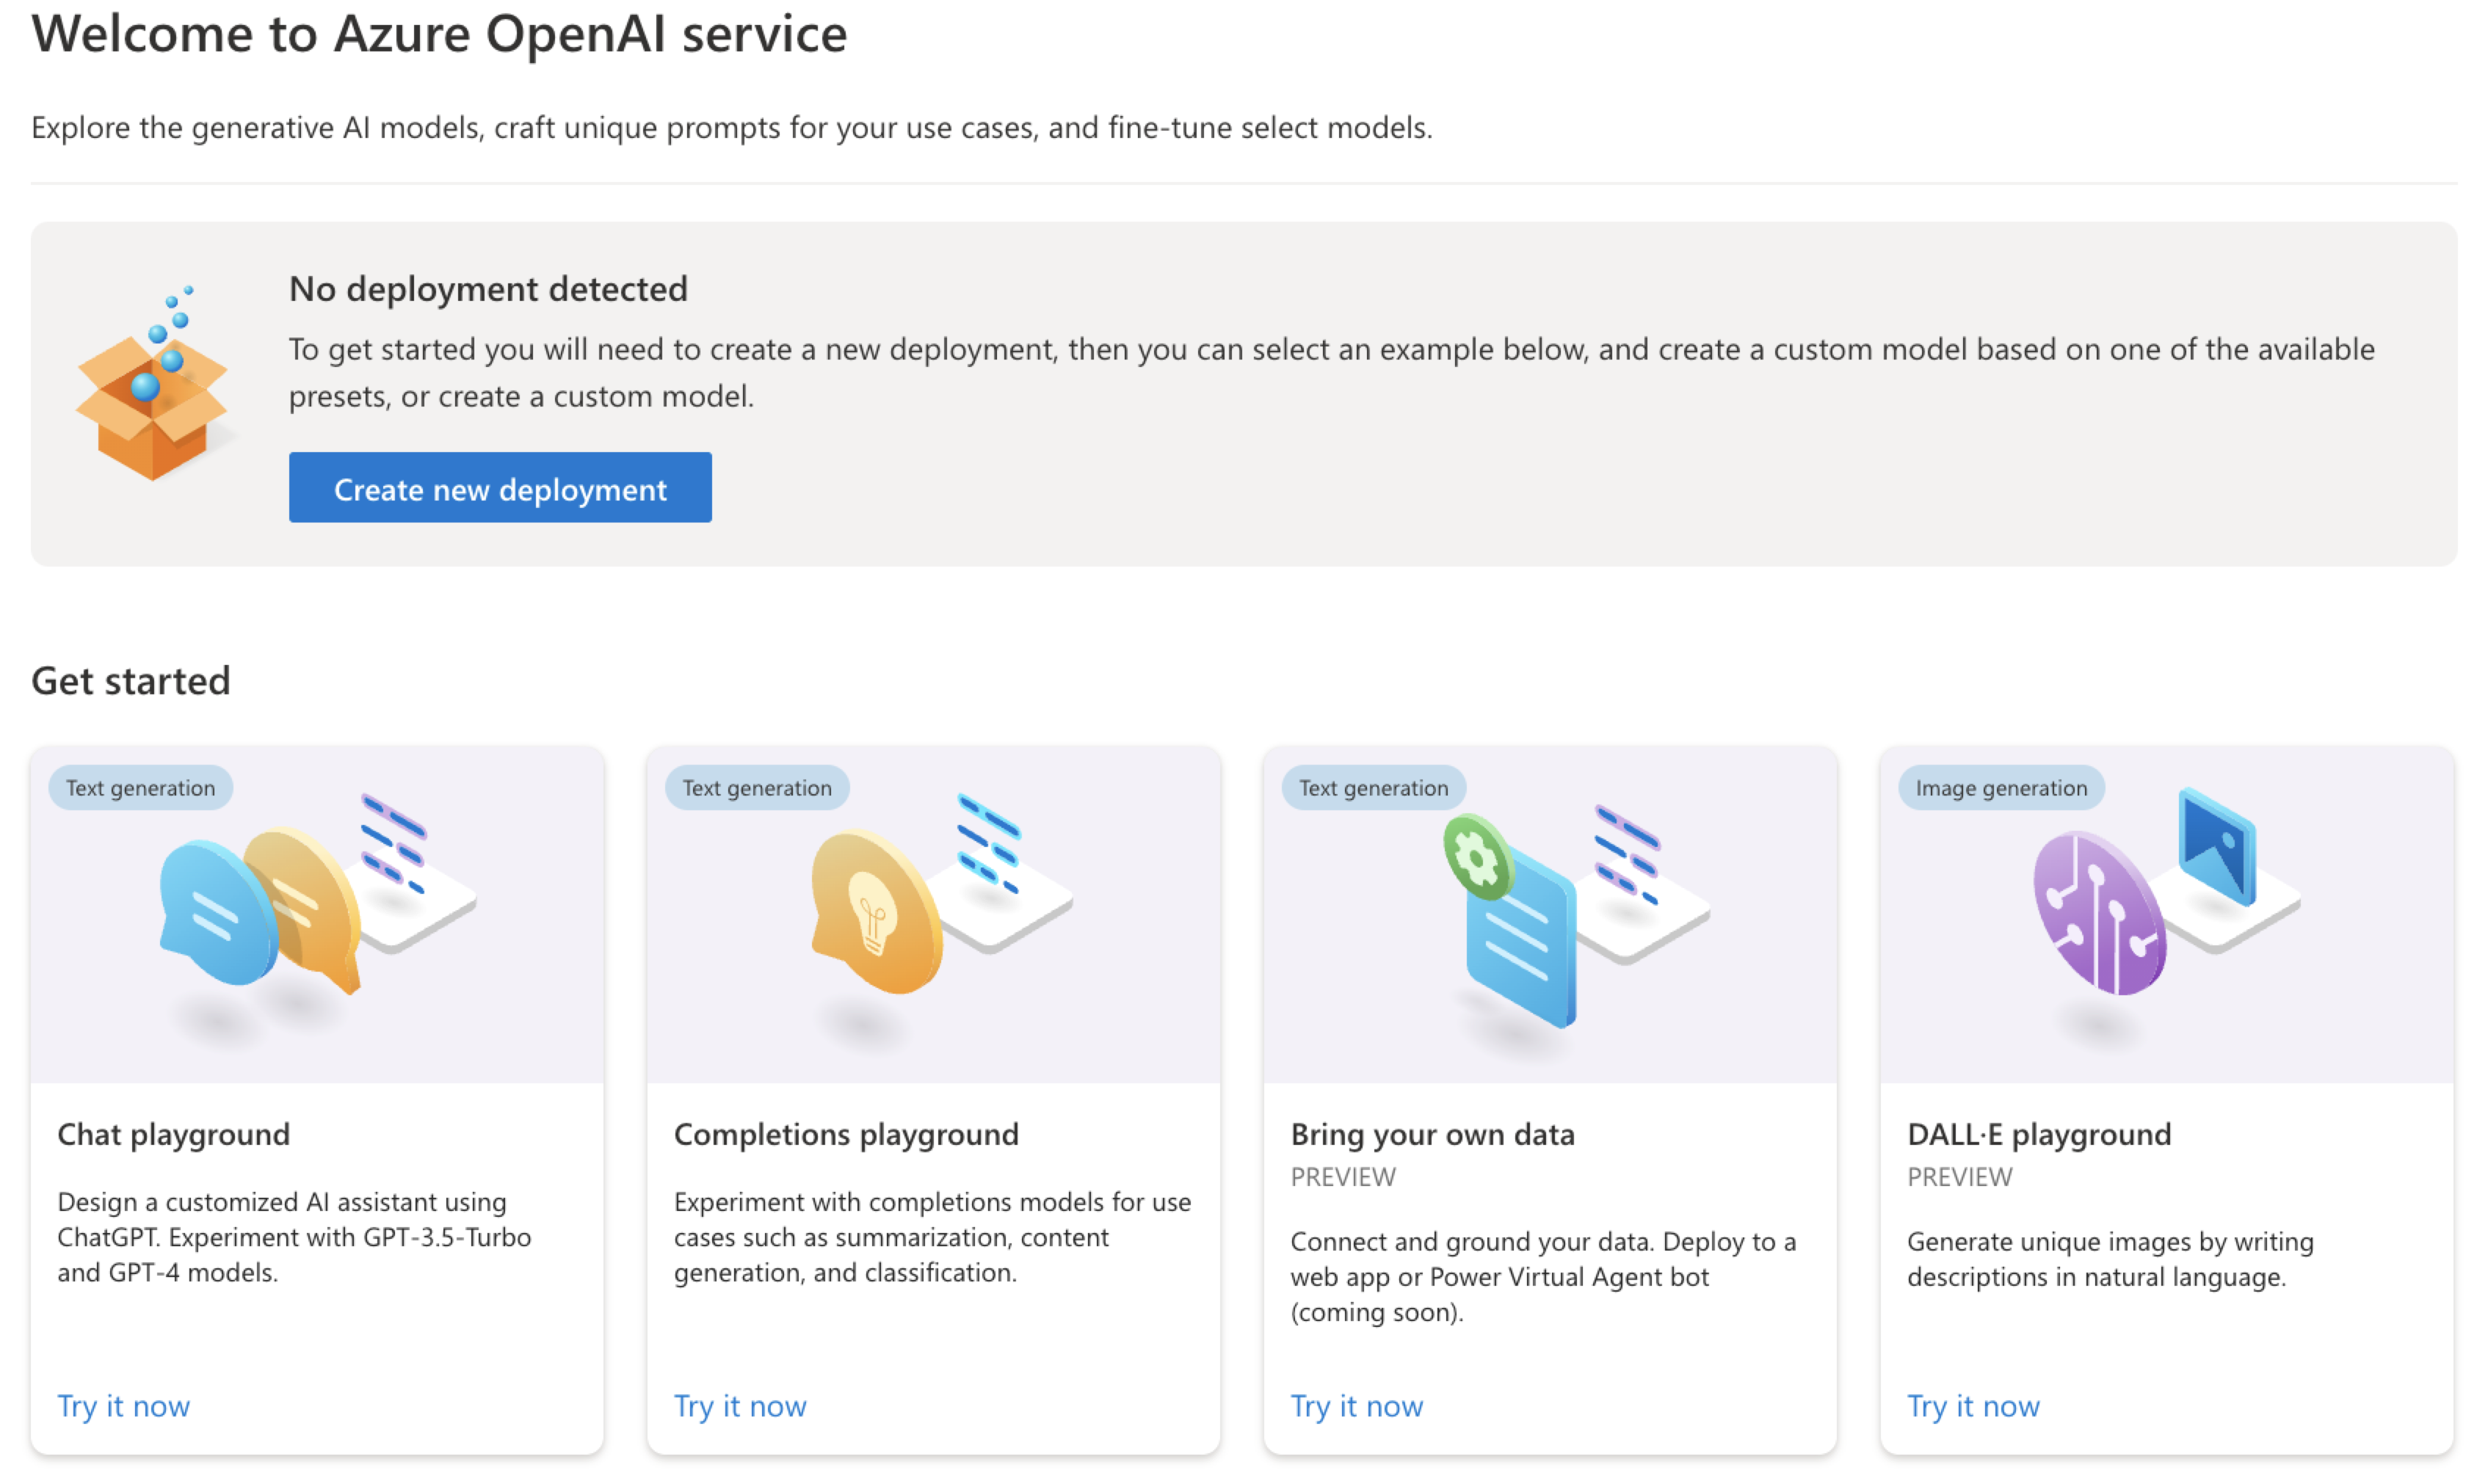
Before diving into the deployments screen, let’s quickly look at a few of the Azure OpenAI Studio features. Azure OpenAI Studio provides several different features such as the Chat playground and Completions playground to experiment with models you deploy. You can also Bring your own data into Azure OpenAI by uploading Word or PowerPoint documents, Markdown files, HTML files, or PDFs. The bring your own data feature combines Azure Cognitive Search with Azure OpenAI models to allow your users to ask questions about your documents using ChatGPT style functionality. In addition to these features, Azure OpenAI Studio also lets you experiment with generating images using the DALL-E playground. Although we won’t be exploring all of these options in this post, take some time to go through them and experiment on your own.
Step 4: Create a Model Deployment
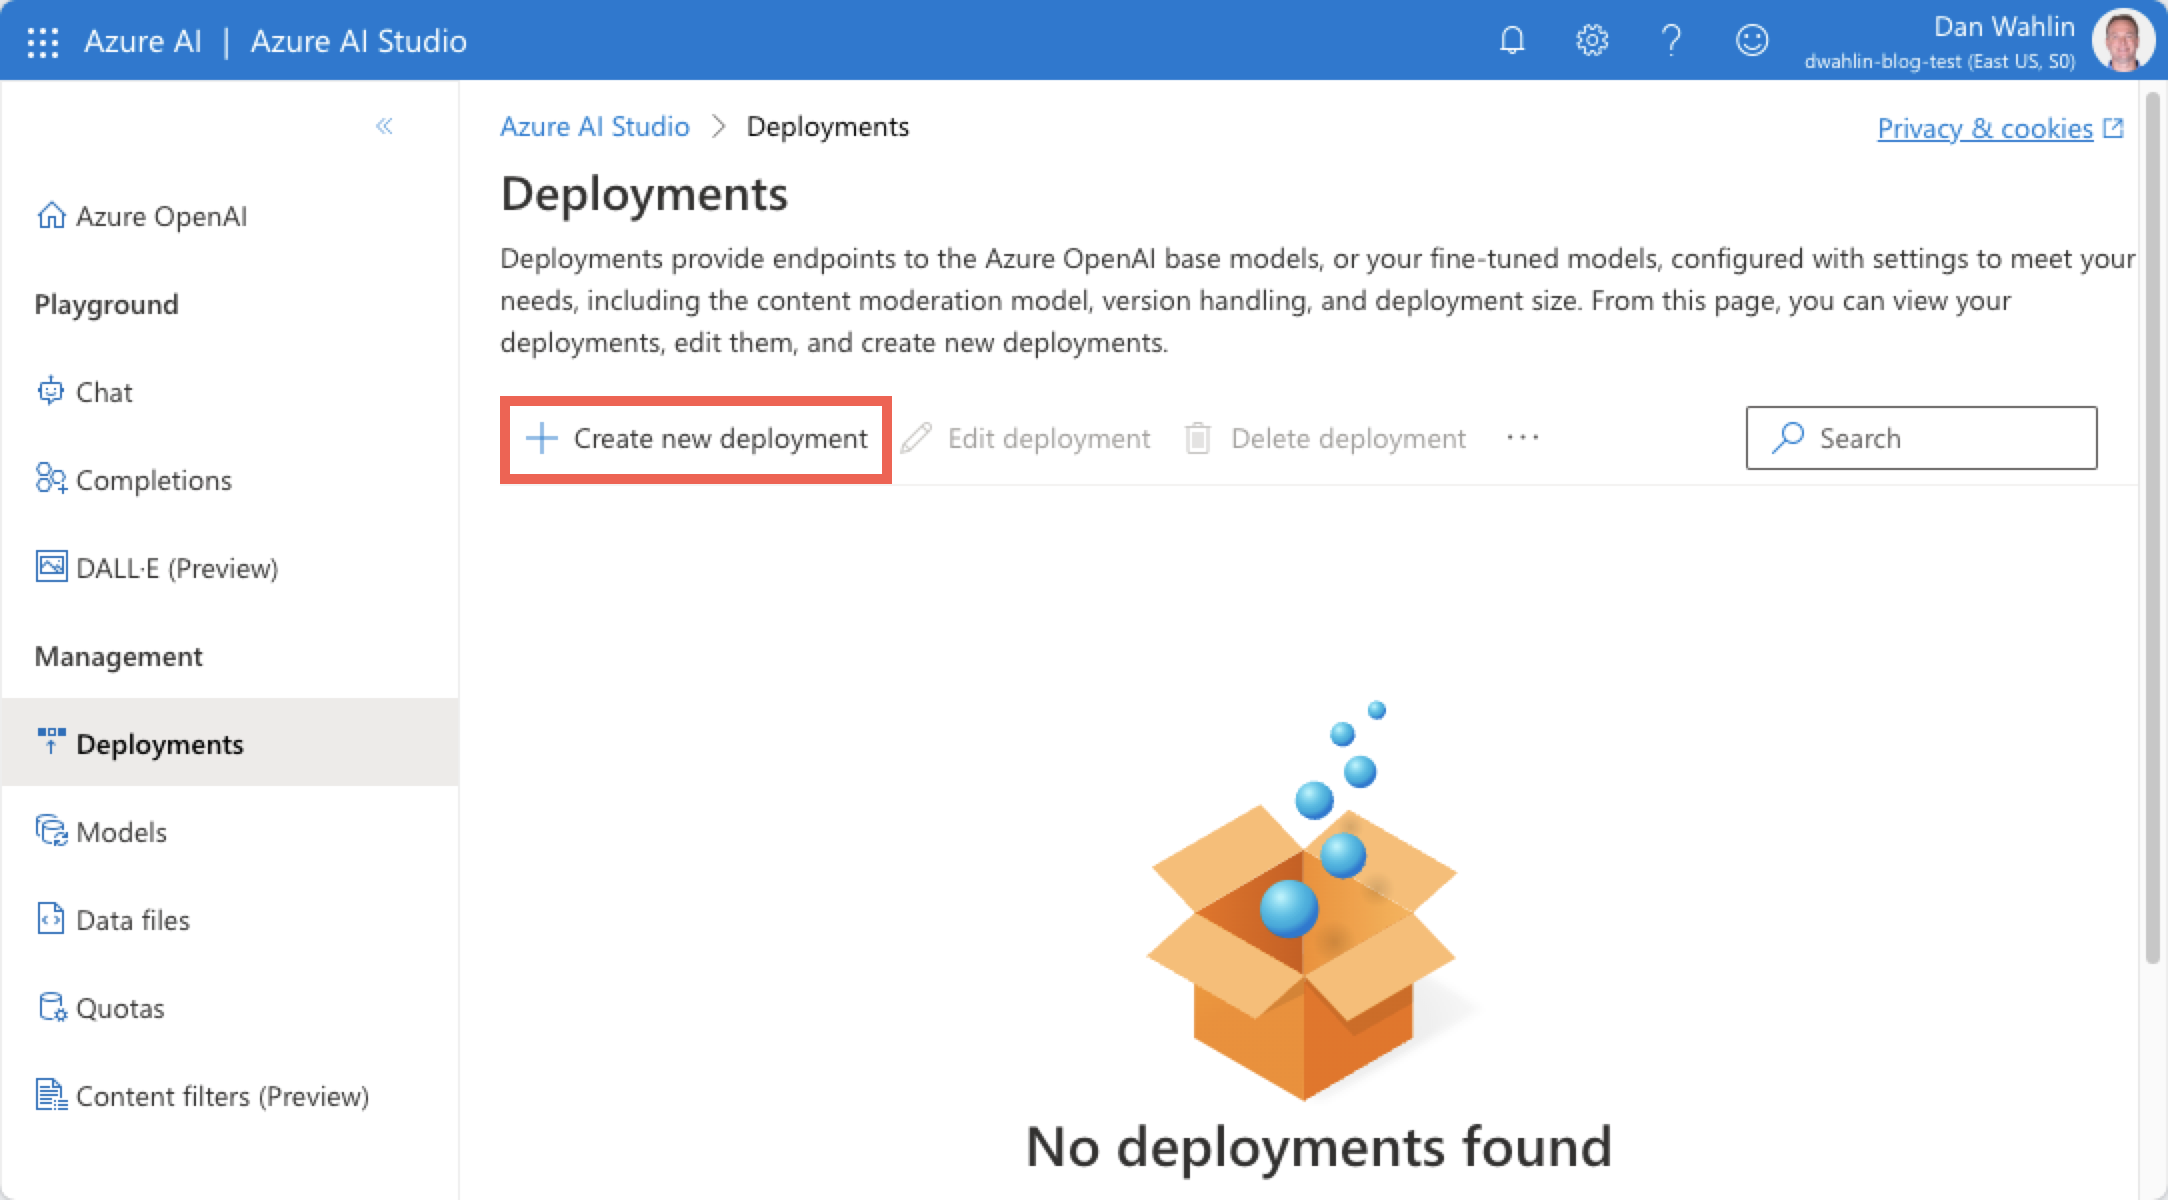
To create a new Azure OpenAI model deployment you need to select a model. We’ll be using the GPT 3.5 turbo model but you should pick one that’s best for your specific needs (learn more about available models in the documentation). In the Deployments screen, select the Create new deployment button.
Note that when you first go from the Azure Portal to Azure OpenAI Studio you may be presented with a dialog to select your subscription and model of choice directly.
Select the gpt-35-turbo model. In this case we’ll use 0613 for the model version since it supports OpenAI function calling. Normally you’ll select the Auto-update to default option especially if you want to ensure that the model works correctly with the different playgrounds (more on this in a moment), but we’re going to live on the wild side to explore a few things.
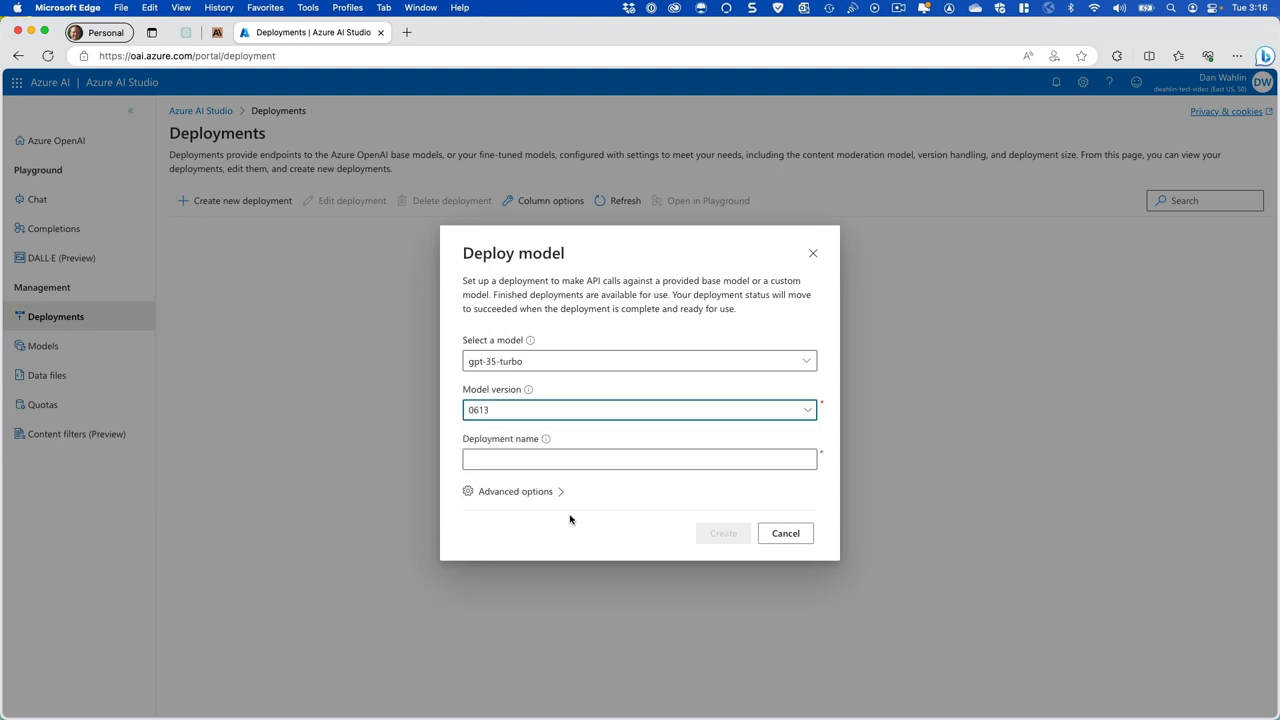
After setting the model and version, give your deployment a name. Something like gpt-35-turbo-0613 works fine. With everything in place you’re ready to select the Create button.
Step 5: Experiment with the Completions Playground
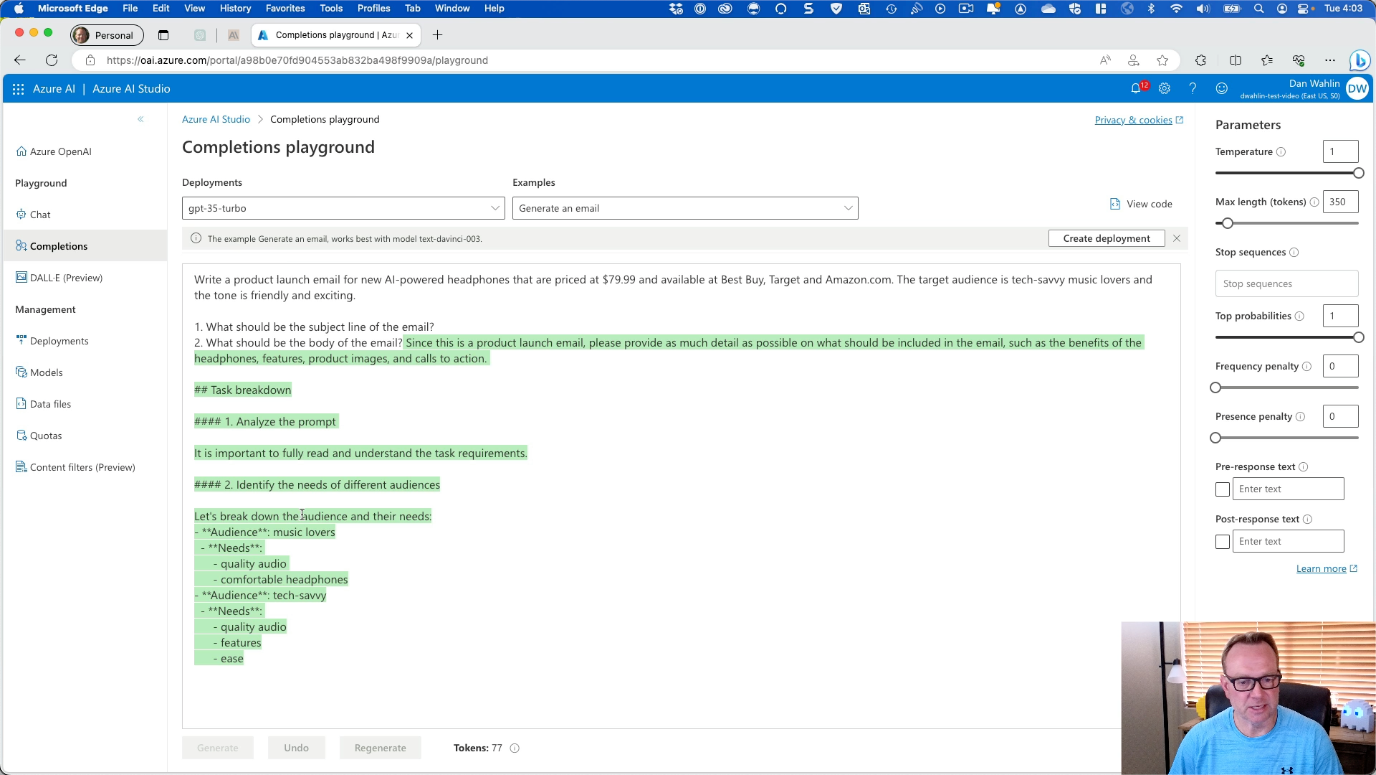
With the model in place, it’s time to see it in action. Let’s jump to the Completions playground in Azure OpenAI Studio. Select the model you deployed as well as an example prompt from the list. We’ll choose the Generate an email prompt in this case and then select Generate.

It’s important to note that a newly created model might need a few minutes to be fully deployed, so if you’re trying the playground functionality immediately after creating the model, you may need to wait a little a few minutes (typically 5 minutes) before you start seeing results. Otherwise you may see an error similar to the following:
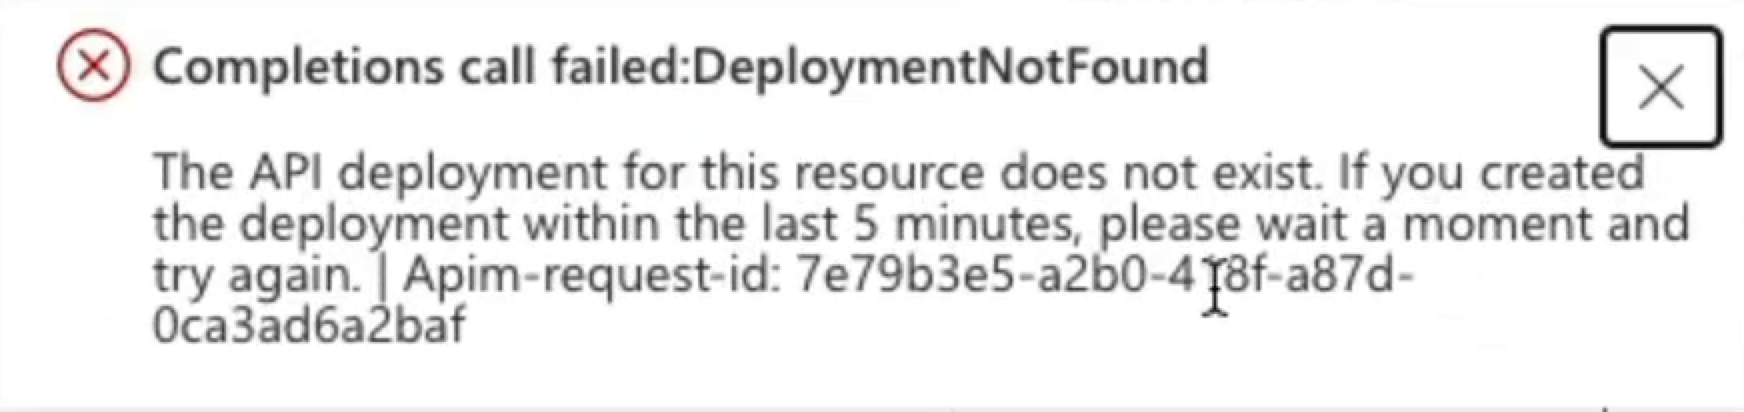
If you see that error, go grab a coffee, and try again in a few minutes.
It’s also important to mention that depending on the model version you use it’s possible that you may see another error in the Completions playground since not all model versions work there. If you get an error similar to the following, go back to the deployments screen you were in earlier and create another model as shown earlier. But, this time select Auto-update to default for the version.
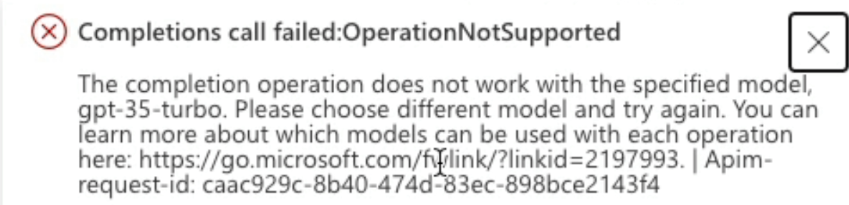
Wait for the new model to deploy and you should now be able to use the Completions playground and see the model in action with the Generate an email prompt.
Conclusion
Congratulations! You’ve just set up and tested a model using Azure OpenAI. Despite a few waiting time issues with fresh models that need to be deployed, and the current non-availability of some model versions in certain playgrounds, Azure OpenAI is a powerful resource to have at your disposal.
Don’t stop there, though. Explore the Chat playground, create images in the DALL-E playground, and do more to get additional experience working with Azure OpenAI.
If you’re wondering how you integrate Azure OpenAI with your applications using the endpoint and key mentioned earlier, stay tuned for a future video and post on that topic!
Found this information useful? Please share it with others and follow me to get updates:
-
Twitter - https://twitter.com/danwahlin
-
LinkedIn - https://www.linkedin.com/in/danwahlin