In this post I’m going to share a quick tip on how to get started calling the Microsoft Graph API. If you’re new to Microsoft Graph, here’s a short definition for you:
Microsoft Graph provides a secure and unified API that can be used to access Microsoft 365 and other cloud data and intelligence.
NOTE: You can watch a video about everything covered here on the Microsoft 365 Developer YouTube channel.
In a nutshell, you can use Microsoft Graph to retrieve information about users, groups, emails, Teams chats, OneDrive files, meetings, to-do list tasks, and much more and then pull that data into apps where your users work every day.
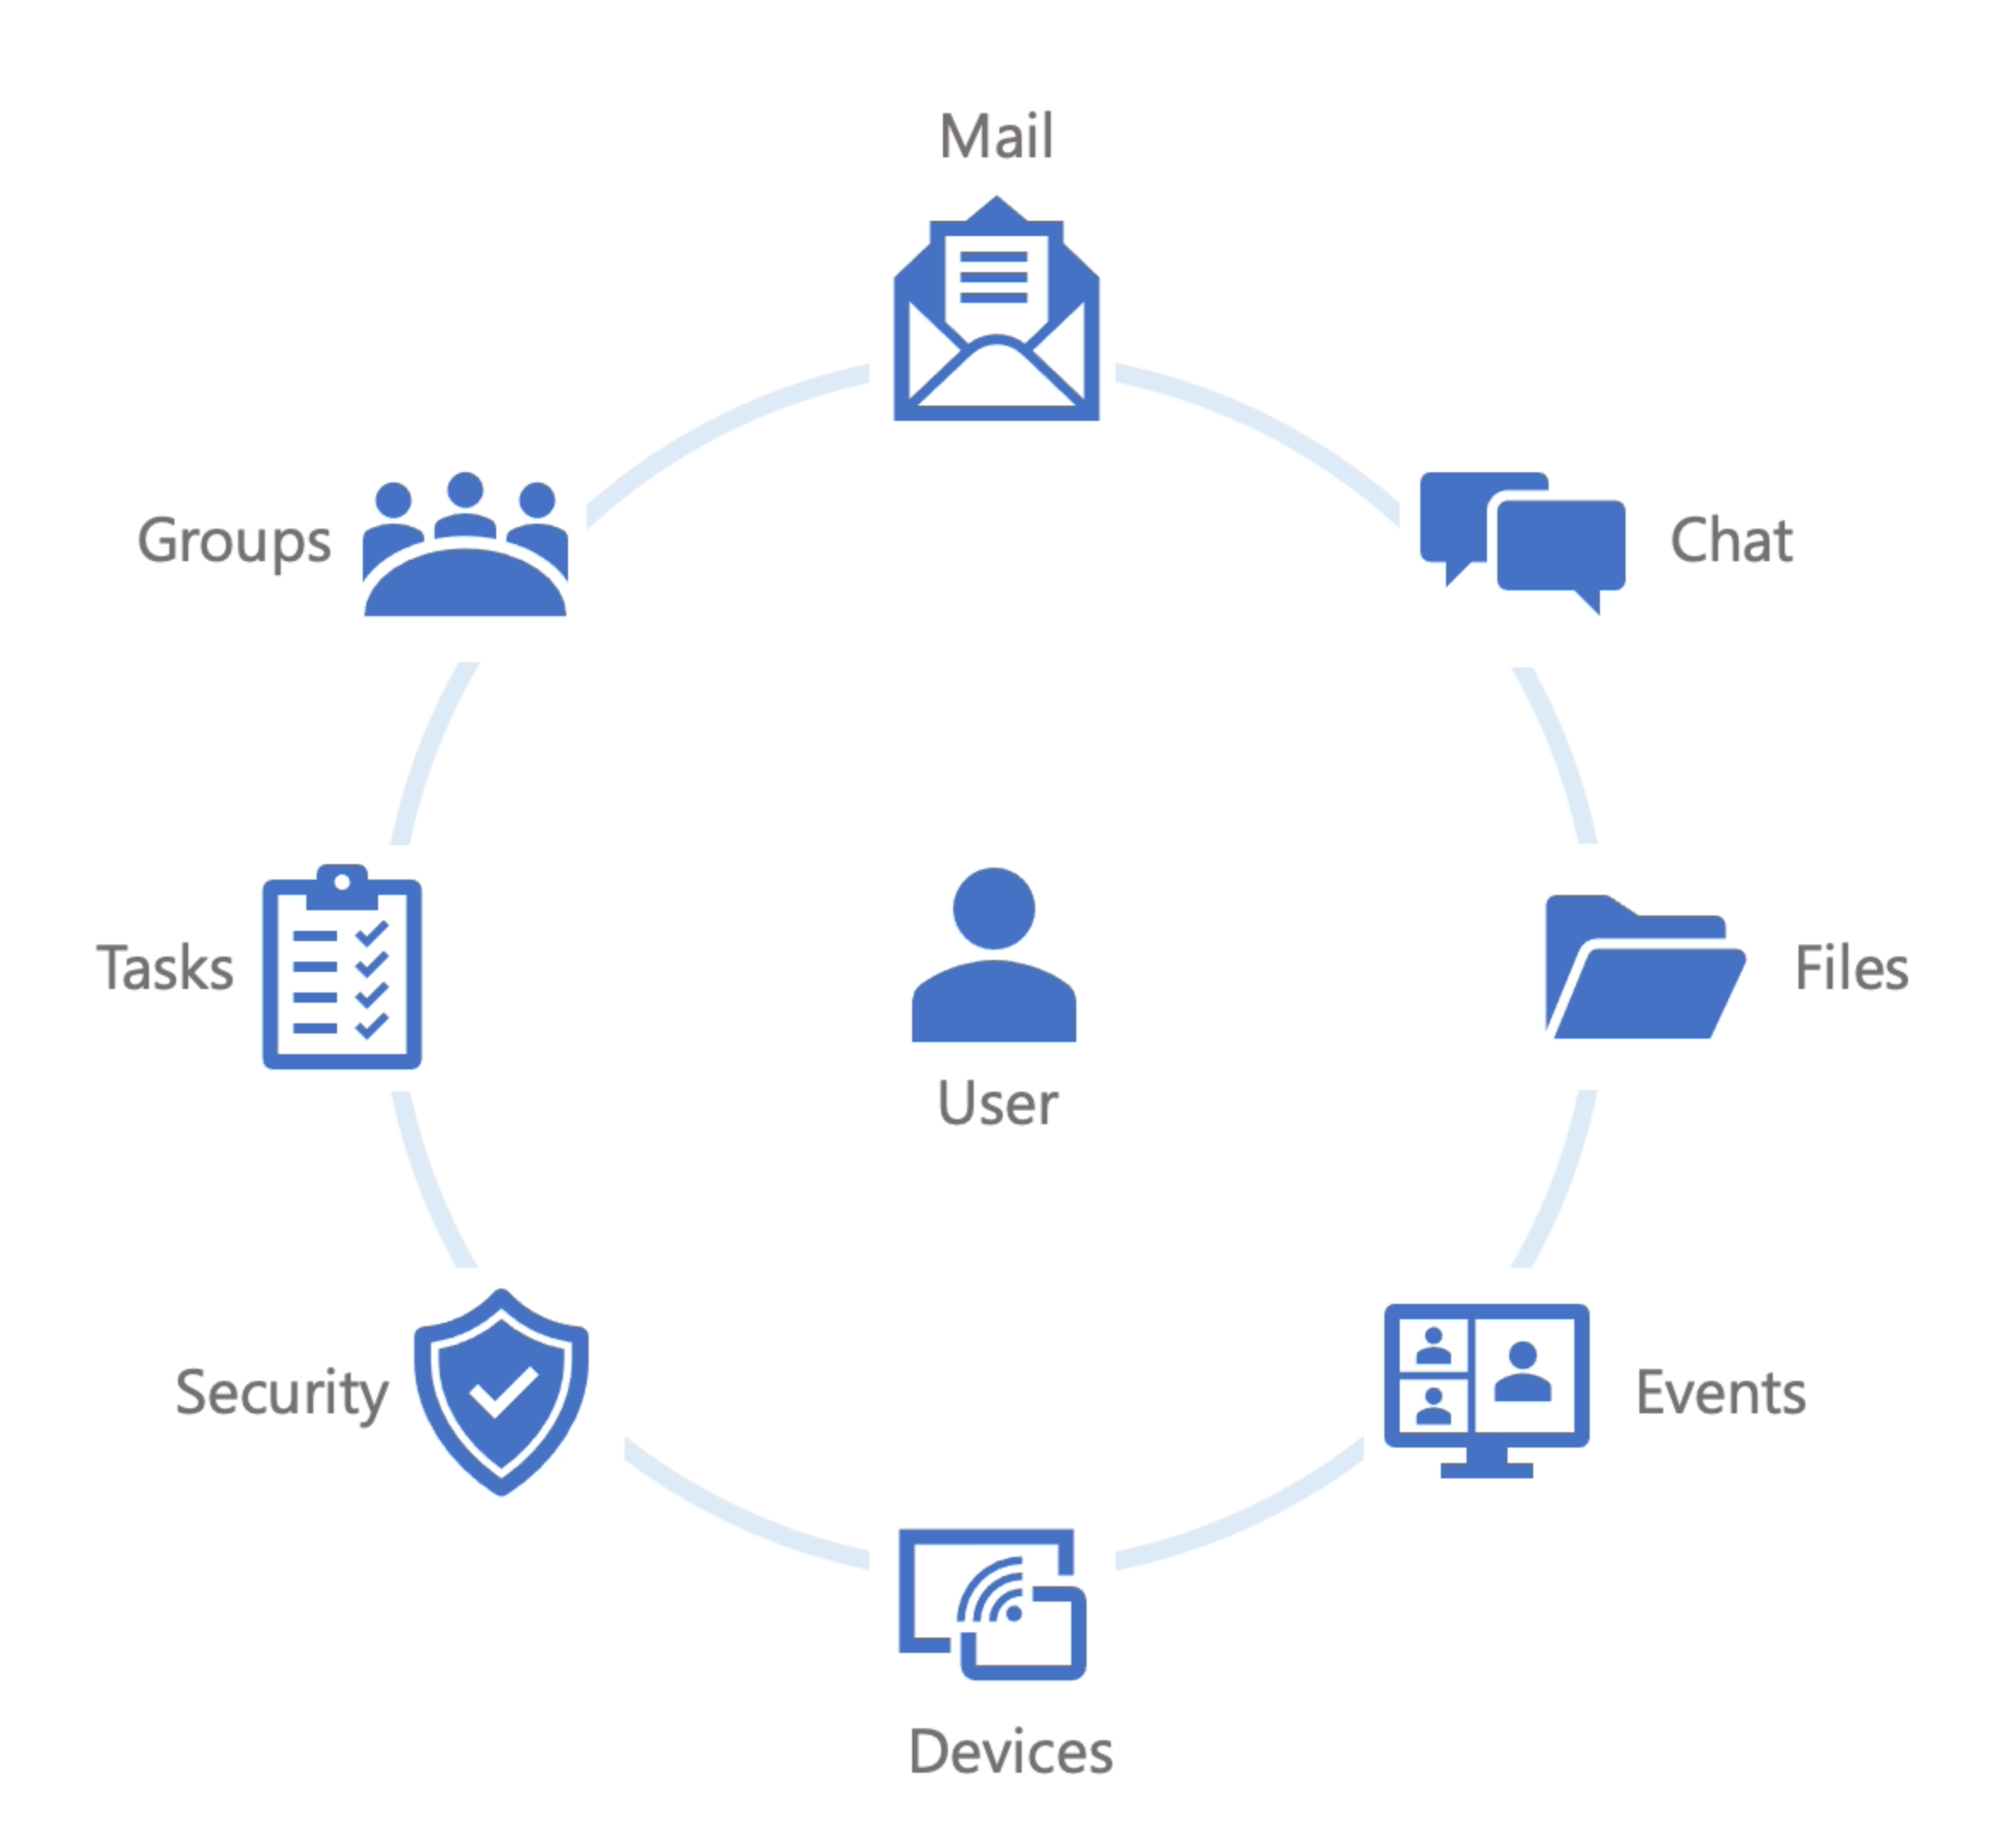
That means if I’m the user using your application, I can login and I see my list of meetings or files related to a particular topic listed right in the app. Or, if I have emails that are related to a particular scenario, I can see my emails after logging in. Of course, this is all done in a secure manner where the user has to consent and give their approval.
Before moving on, it’s important to clarify one thing: Microsoft Graph isn’t graph DB or GraphQL. Microsoft Graph is a RESTful API so the same principles you’ve likely used with other APIs (Web API with .NET, APIs exposed using Express/Node.js, and so forth) can be used.
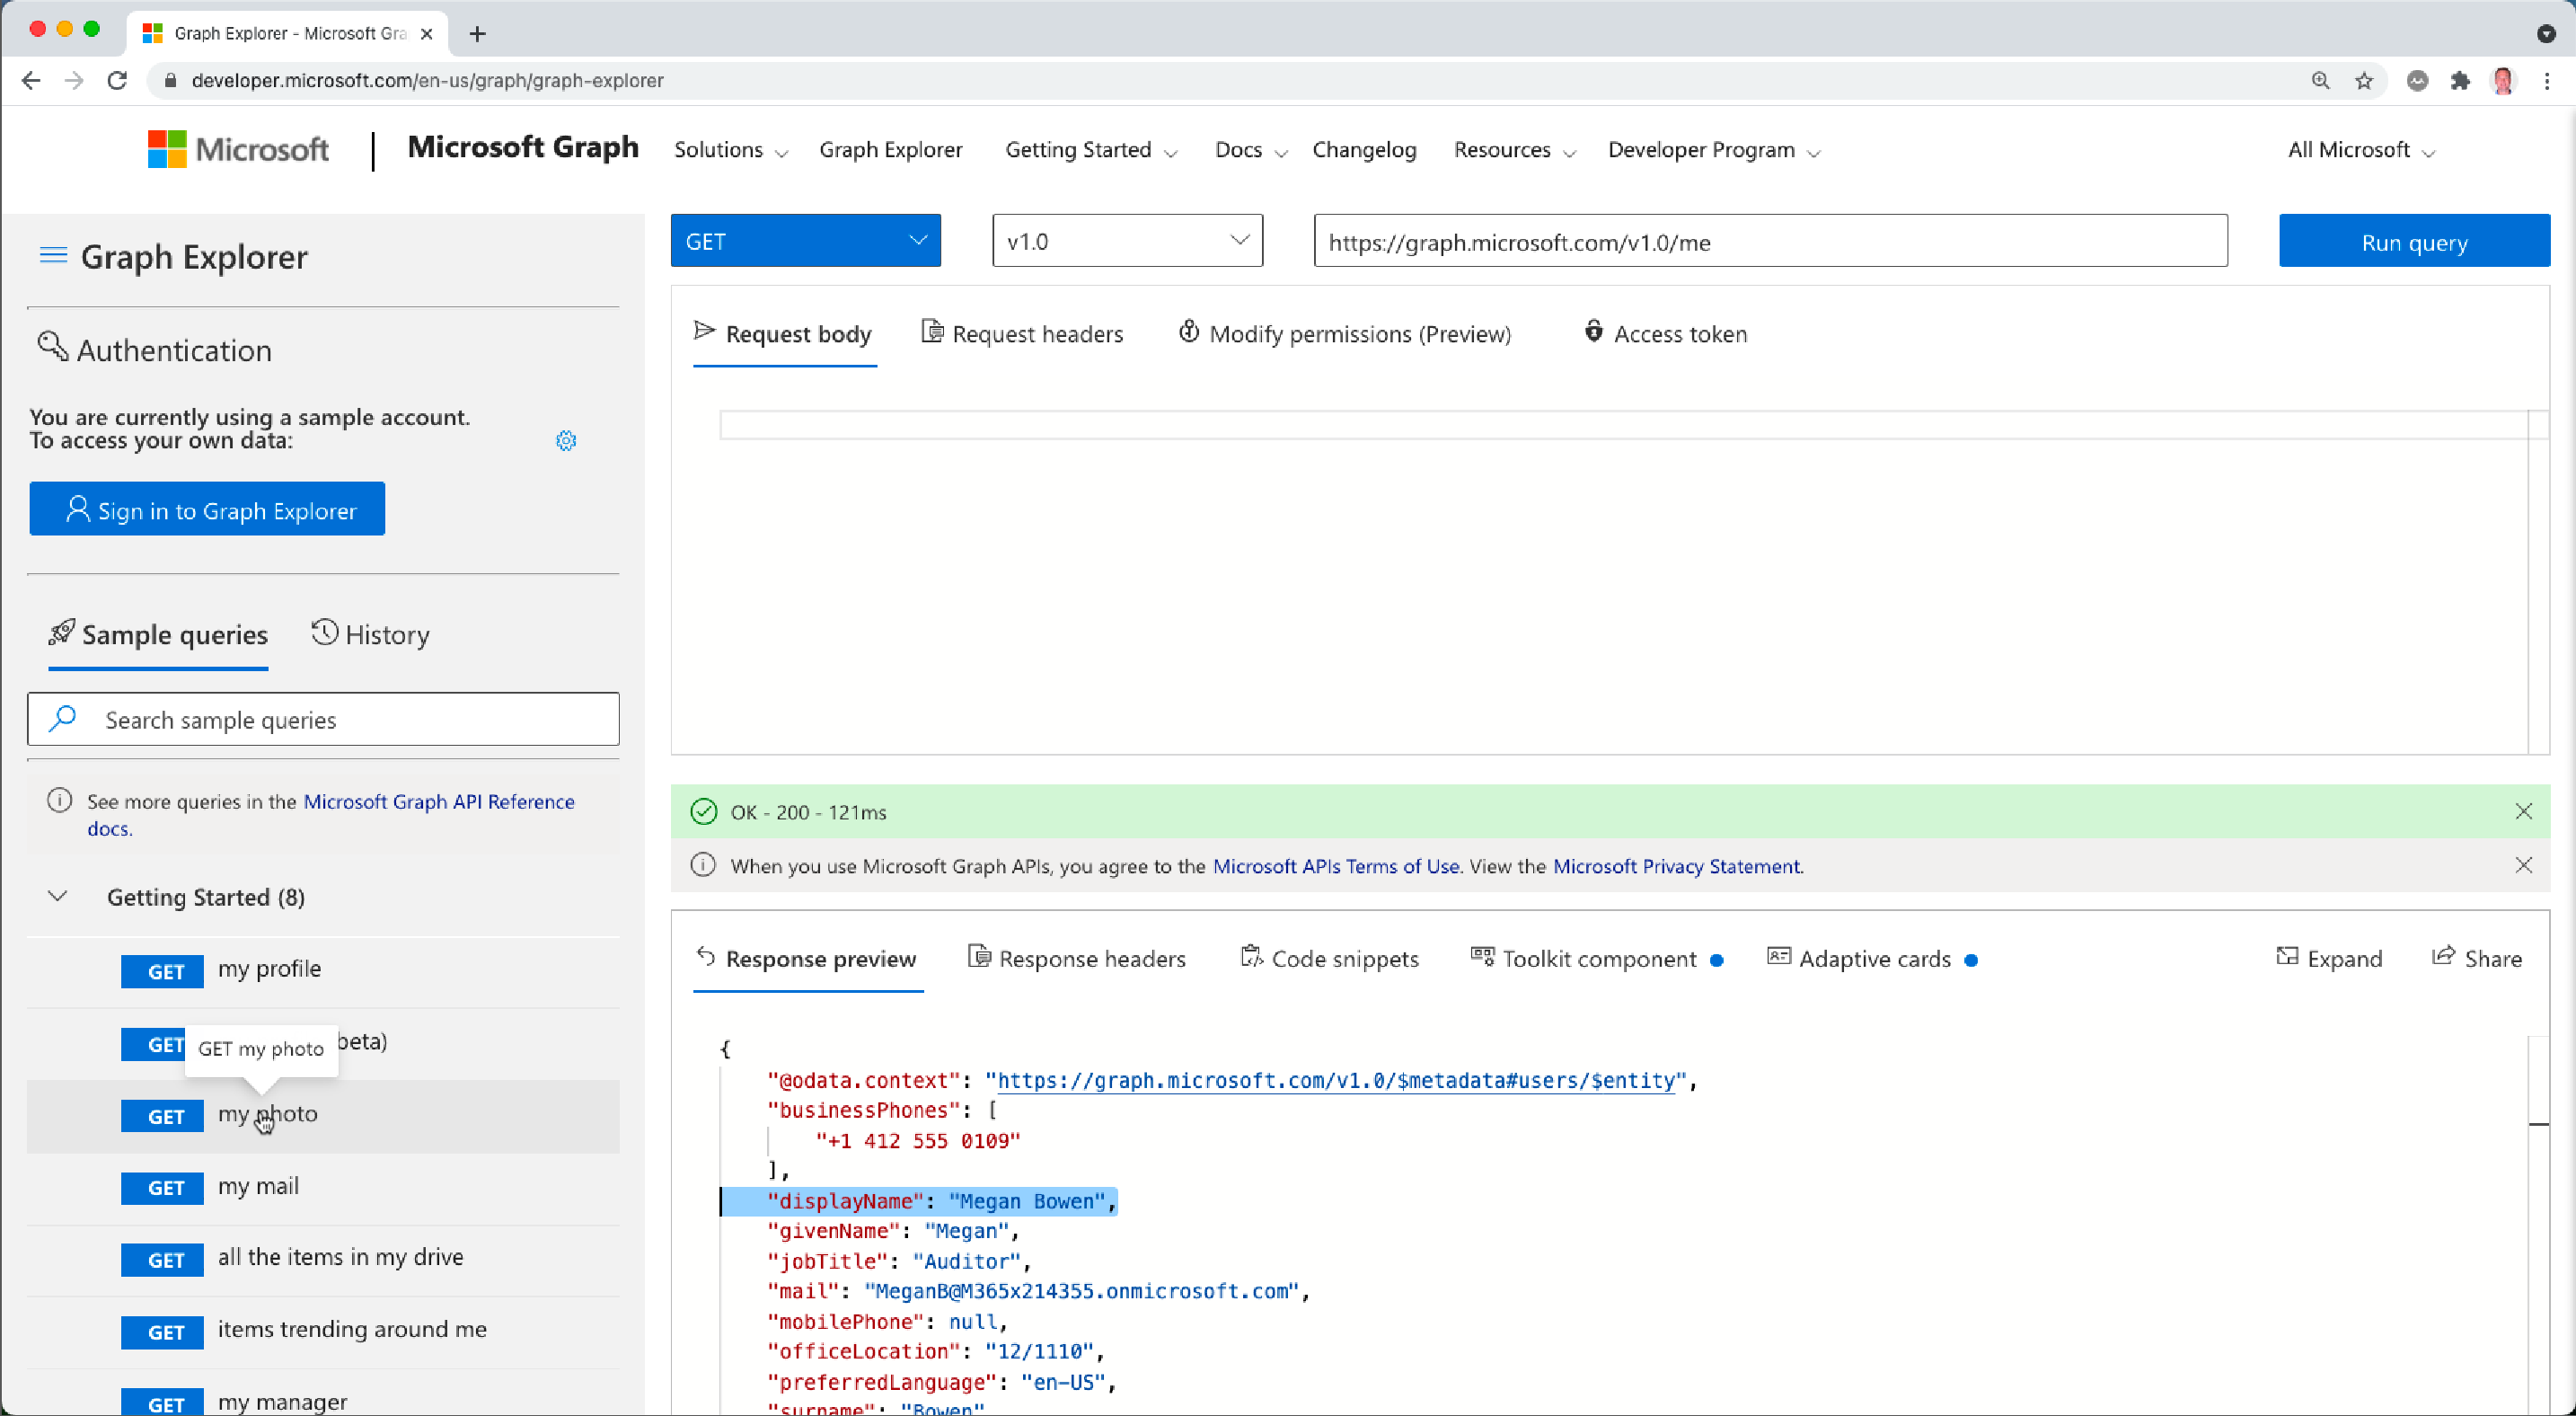
To get started with Microsoft Graph you can use the Microsoft Graph Explorer. At the Microsoft Graph Explorer website you can see what Microsoft graph APIs are available and practice using them all within the confines of the browser. For example, in the images below you’ll notice there is an area where you can select a sample query to run and an area where the API’s URL is defined. Select the “my profile” option in the Sample queries section to get started.
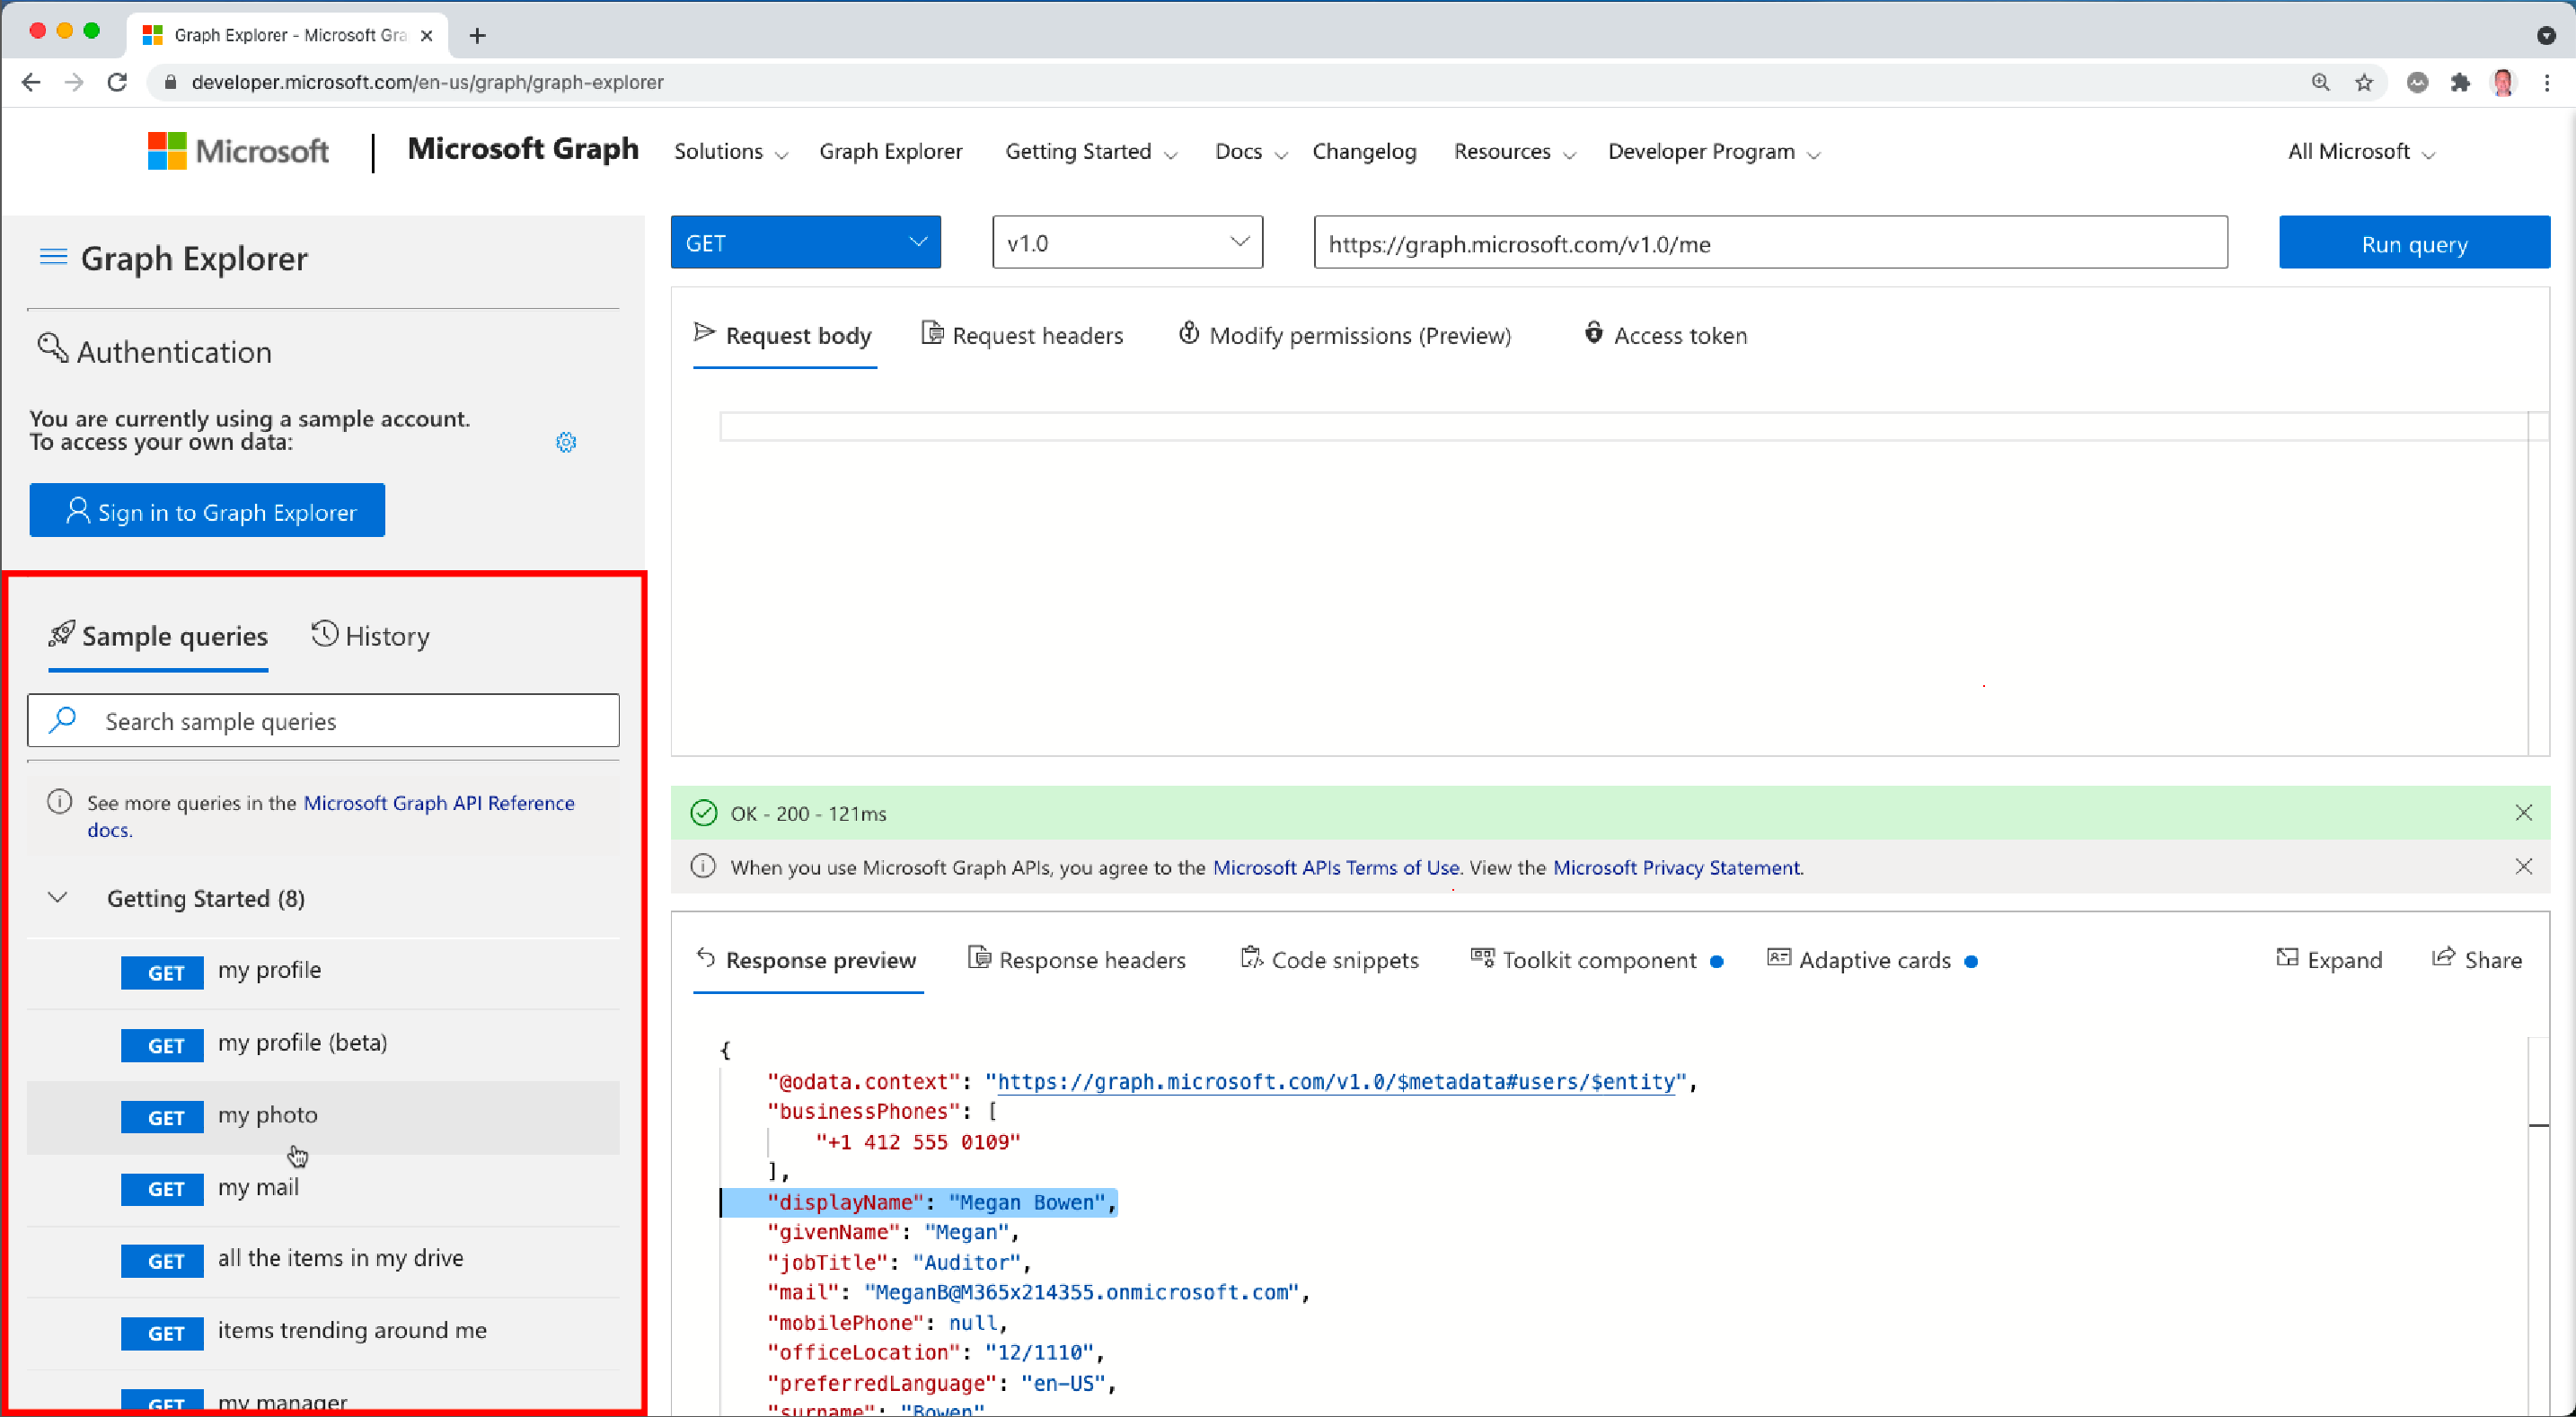
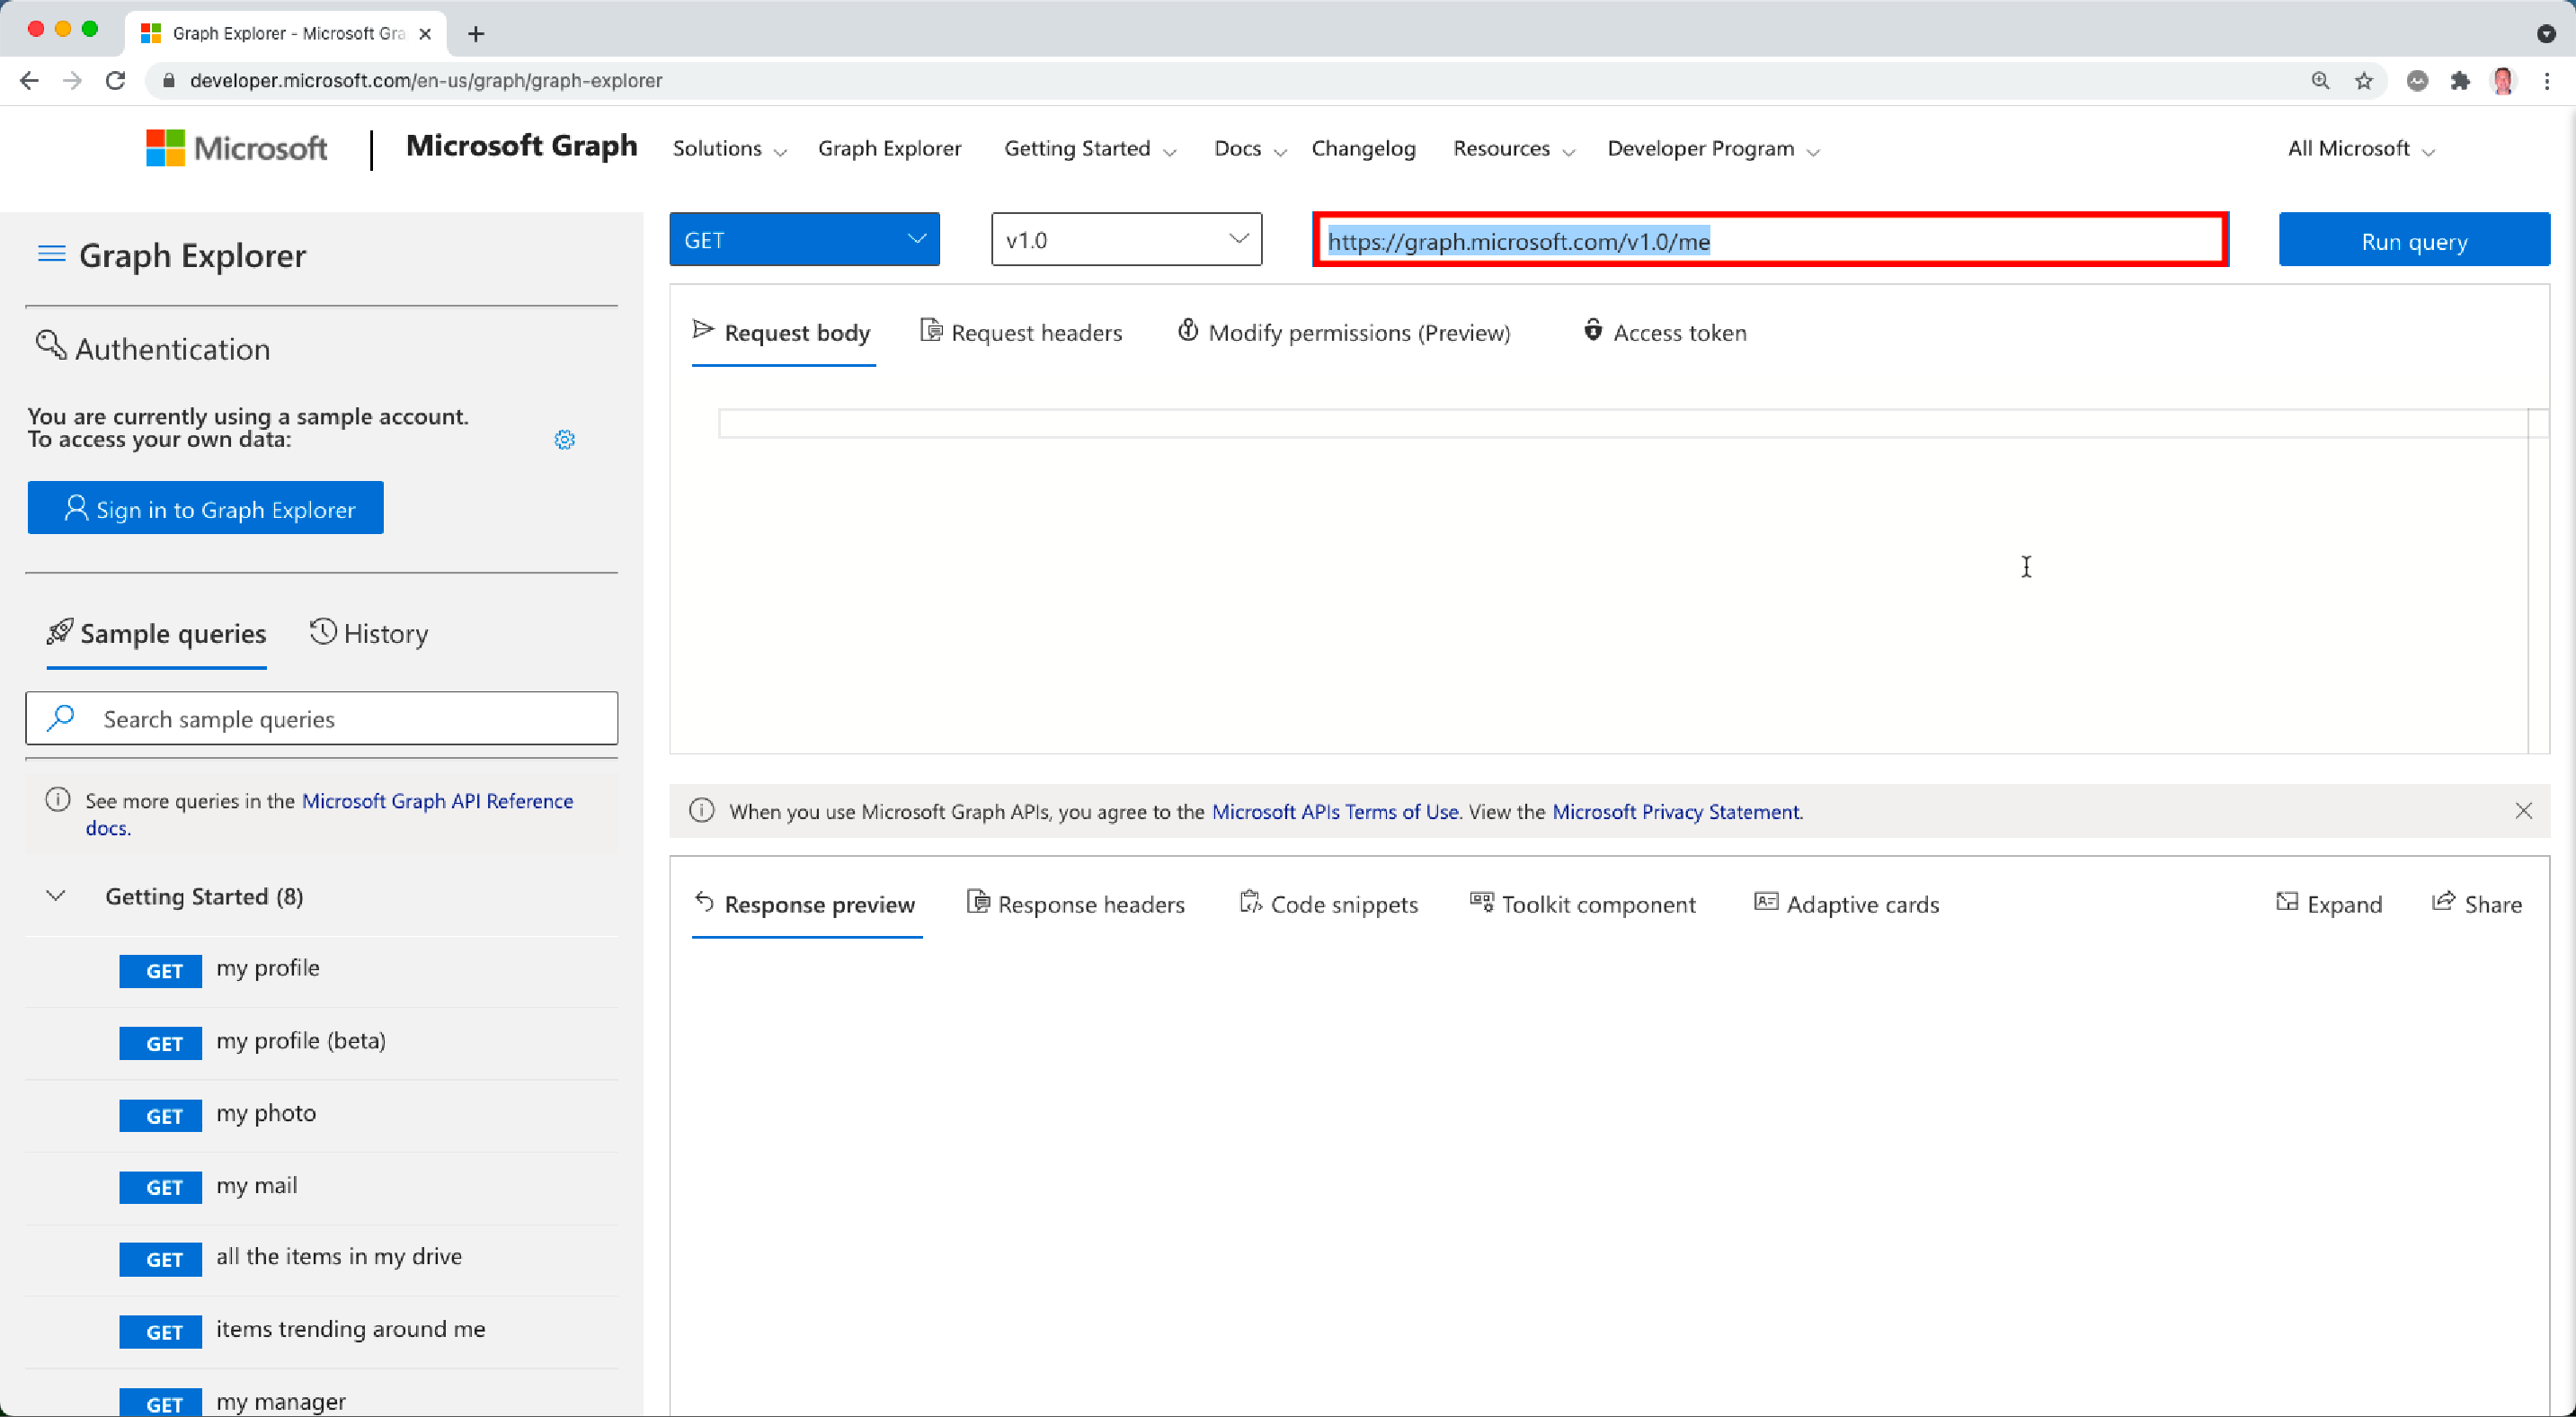
As mentioned, Microsoft Graph is a RESTful API used to get Microsoft 365 data. For example, I can call into the profile API and get the logged in user’s profile using the following URL (shown above in the previous image):
https://graph.microsoft.com/v1.0/meWhen you first go to the Microsoft Graph Explorer you won’t be logged in. That means you’ll be getting anonymous data back for a user’s profile and you’ll see a display name of Megan Bowen is used. You can also get some information about Megan’s email address and some other info as well in her profile. Notice that the data returned is JSON (JavaScript Object Notation) data.
In addition to that, you can run other queries. If you want to do this for Megan (the anonymous user you’ll see) you can leave it as is, but if you want to do it for yourself, you can either log in with your credentials or better yet you could log in with a free developer tenant so that you can safely play around.
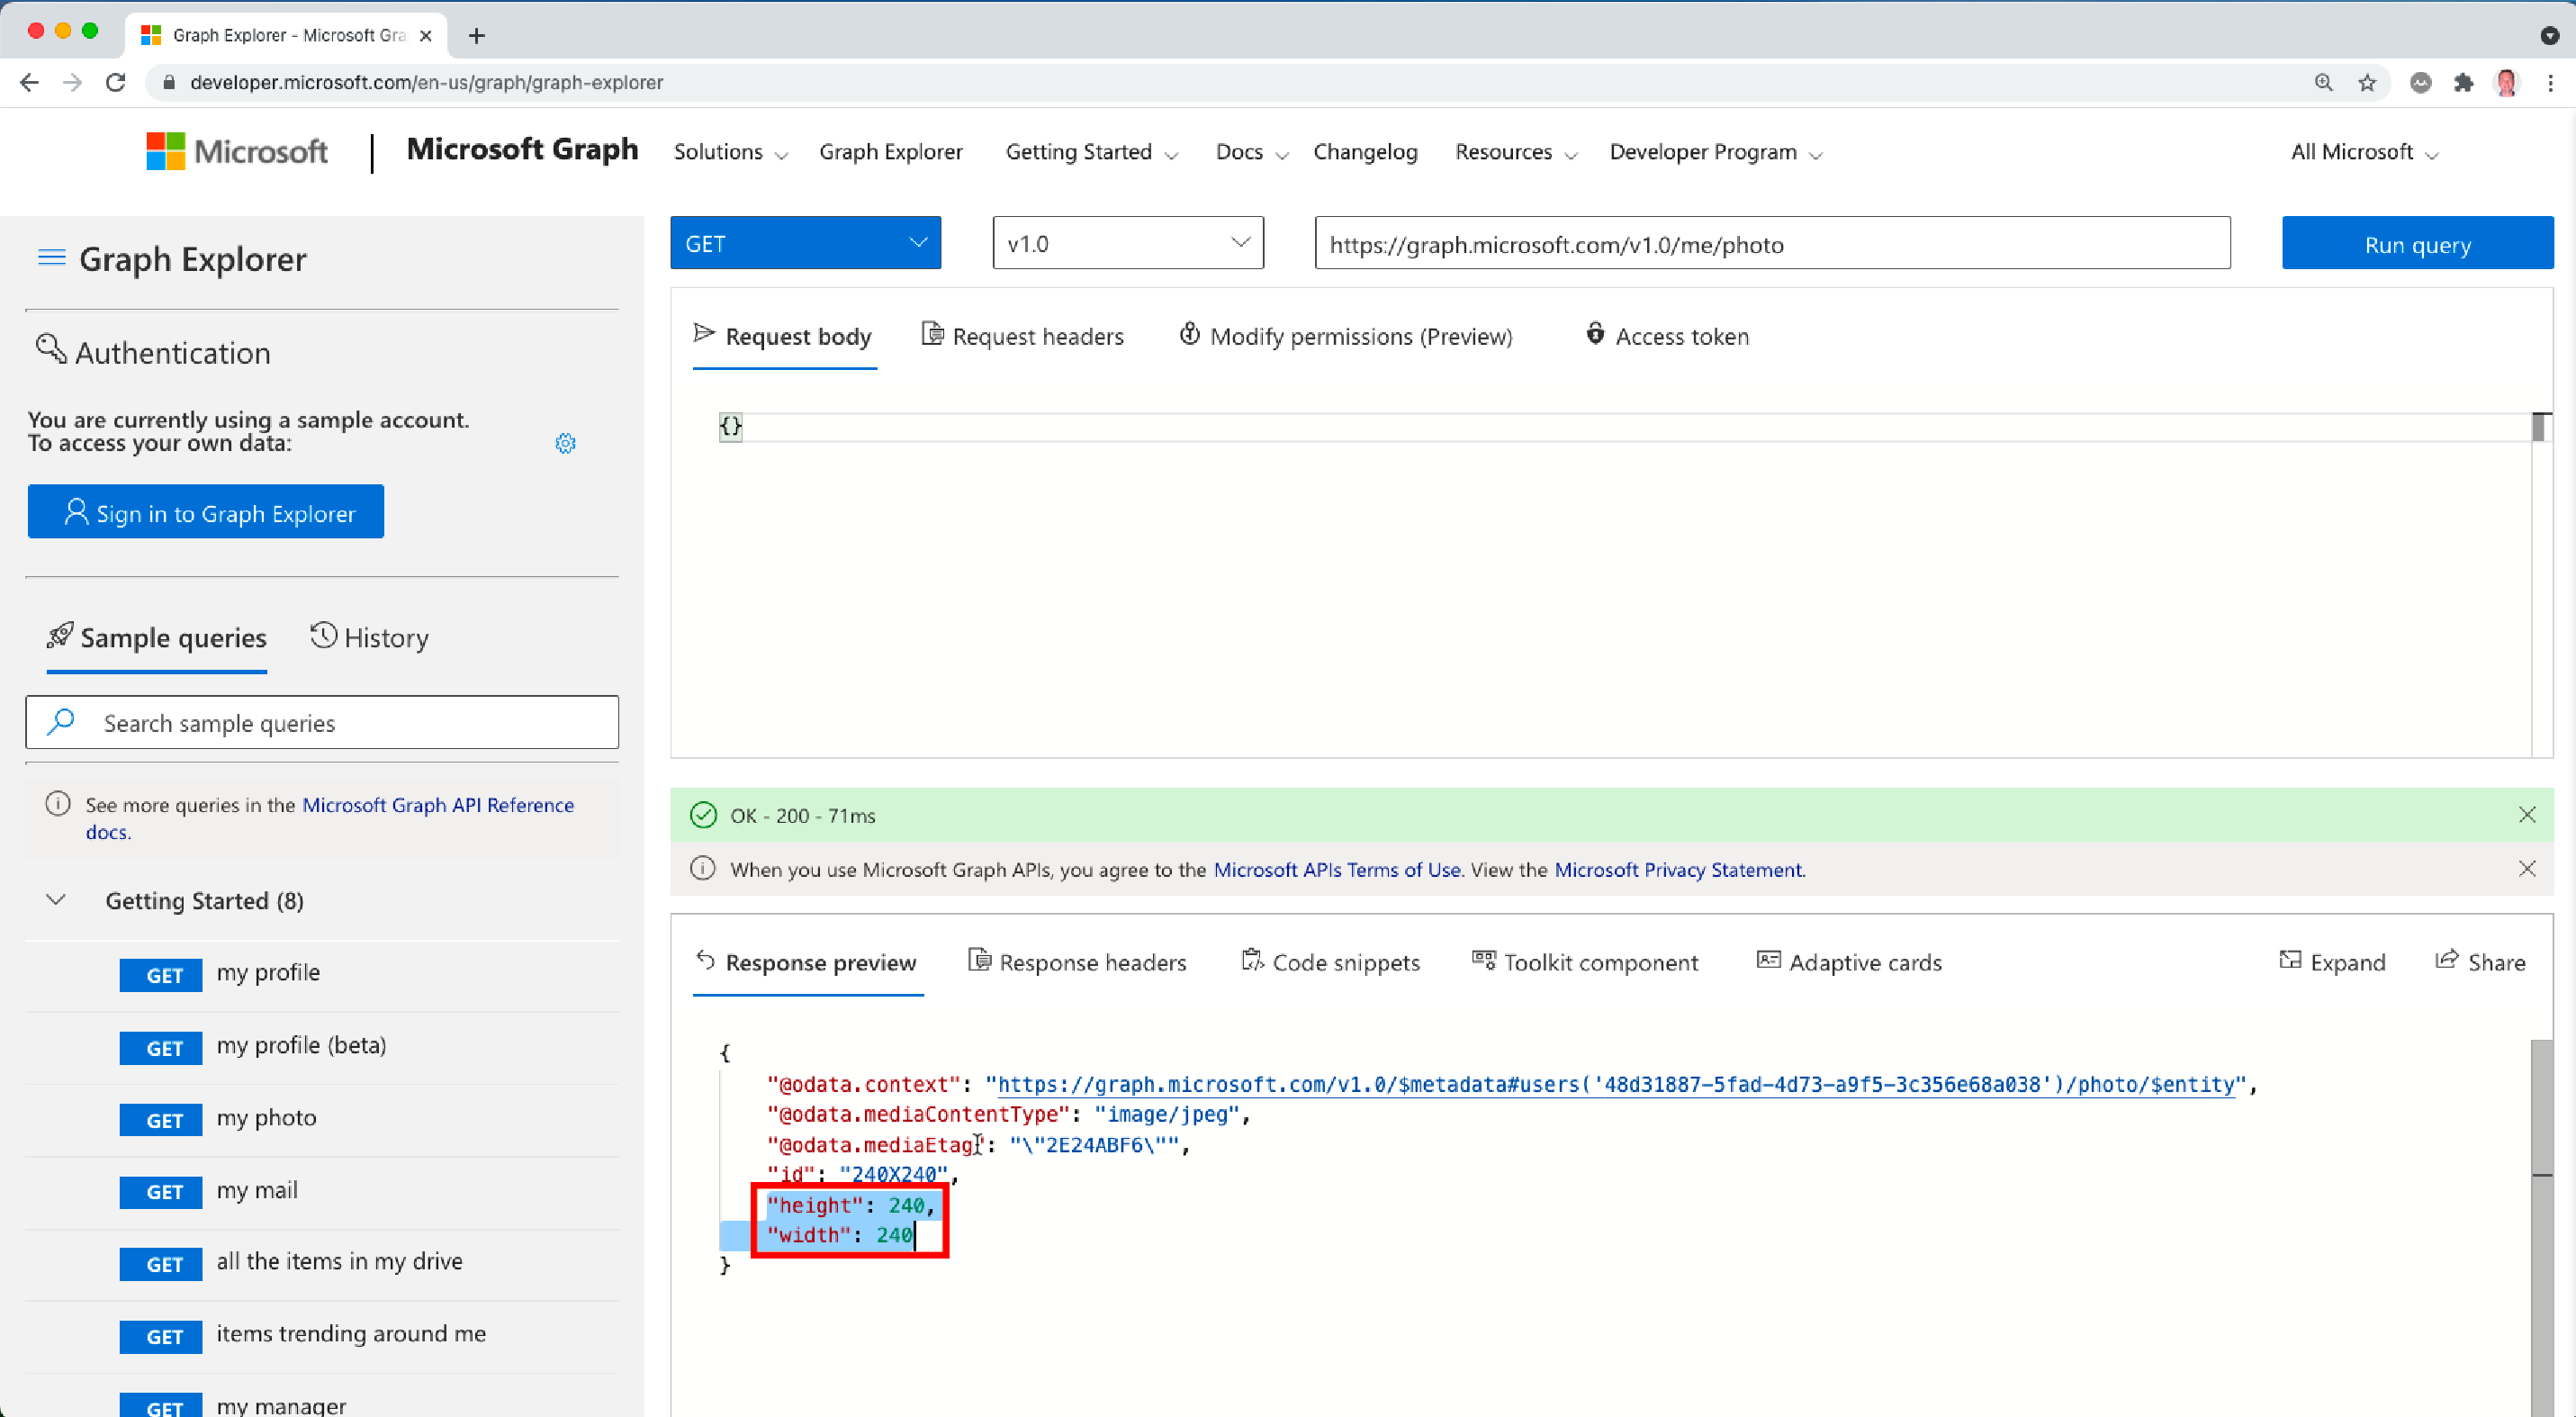
If you go to the sample queries section and click on “my photo” you’ll see Megan’s photo displayed in the browser. Look at the API URL and you’ll notice the following value displayed:
https://graph.microsoft.com/v1.0/me/photo/$valueIf you delete $value, you’ll get back JSON data about the image. Notice that it contains height, width, and some other data as well.
You can get to Megan’s email messages as well. I want to emphasize again that you have to have a logged in user who has consented to access this information. If you want to display a user’s email messages, they’d have to log in first. If they approve it, you could pull their mail in and display it to them in an app.
For example, maybe you’re working on a sales application right now, and you want to pull in sales specific emails so that they can see what they’ve said in the past to customers. You could filter based on subject, for example, and then display the body of the message to the sales person after they’ve logged in.
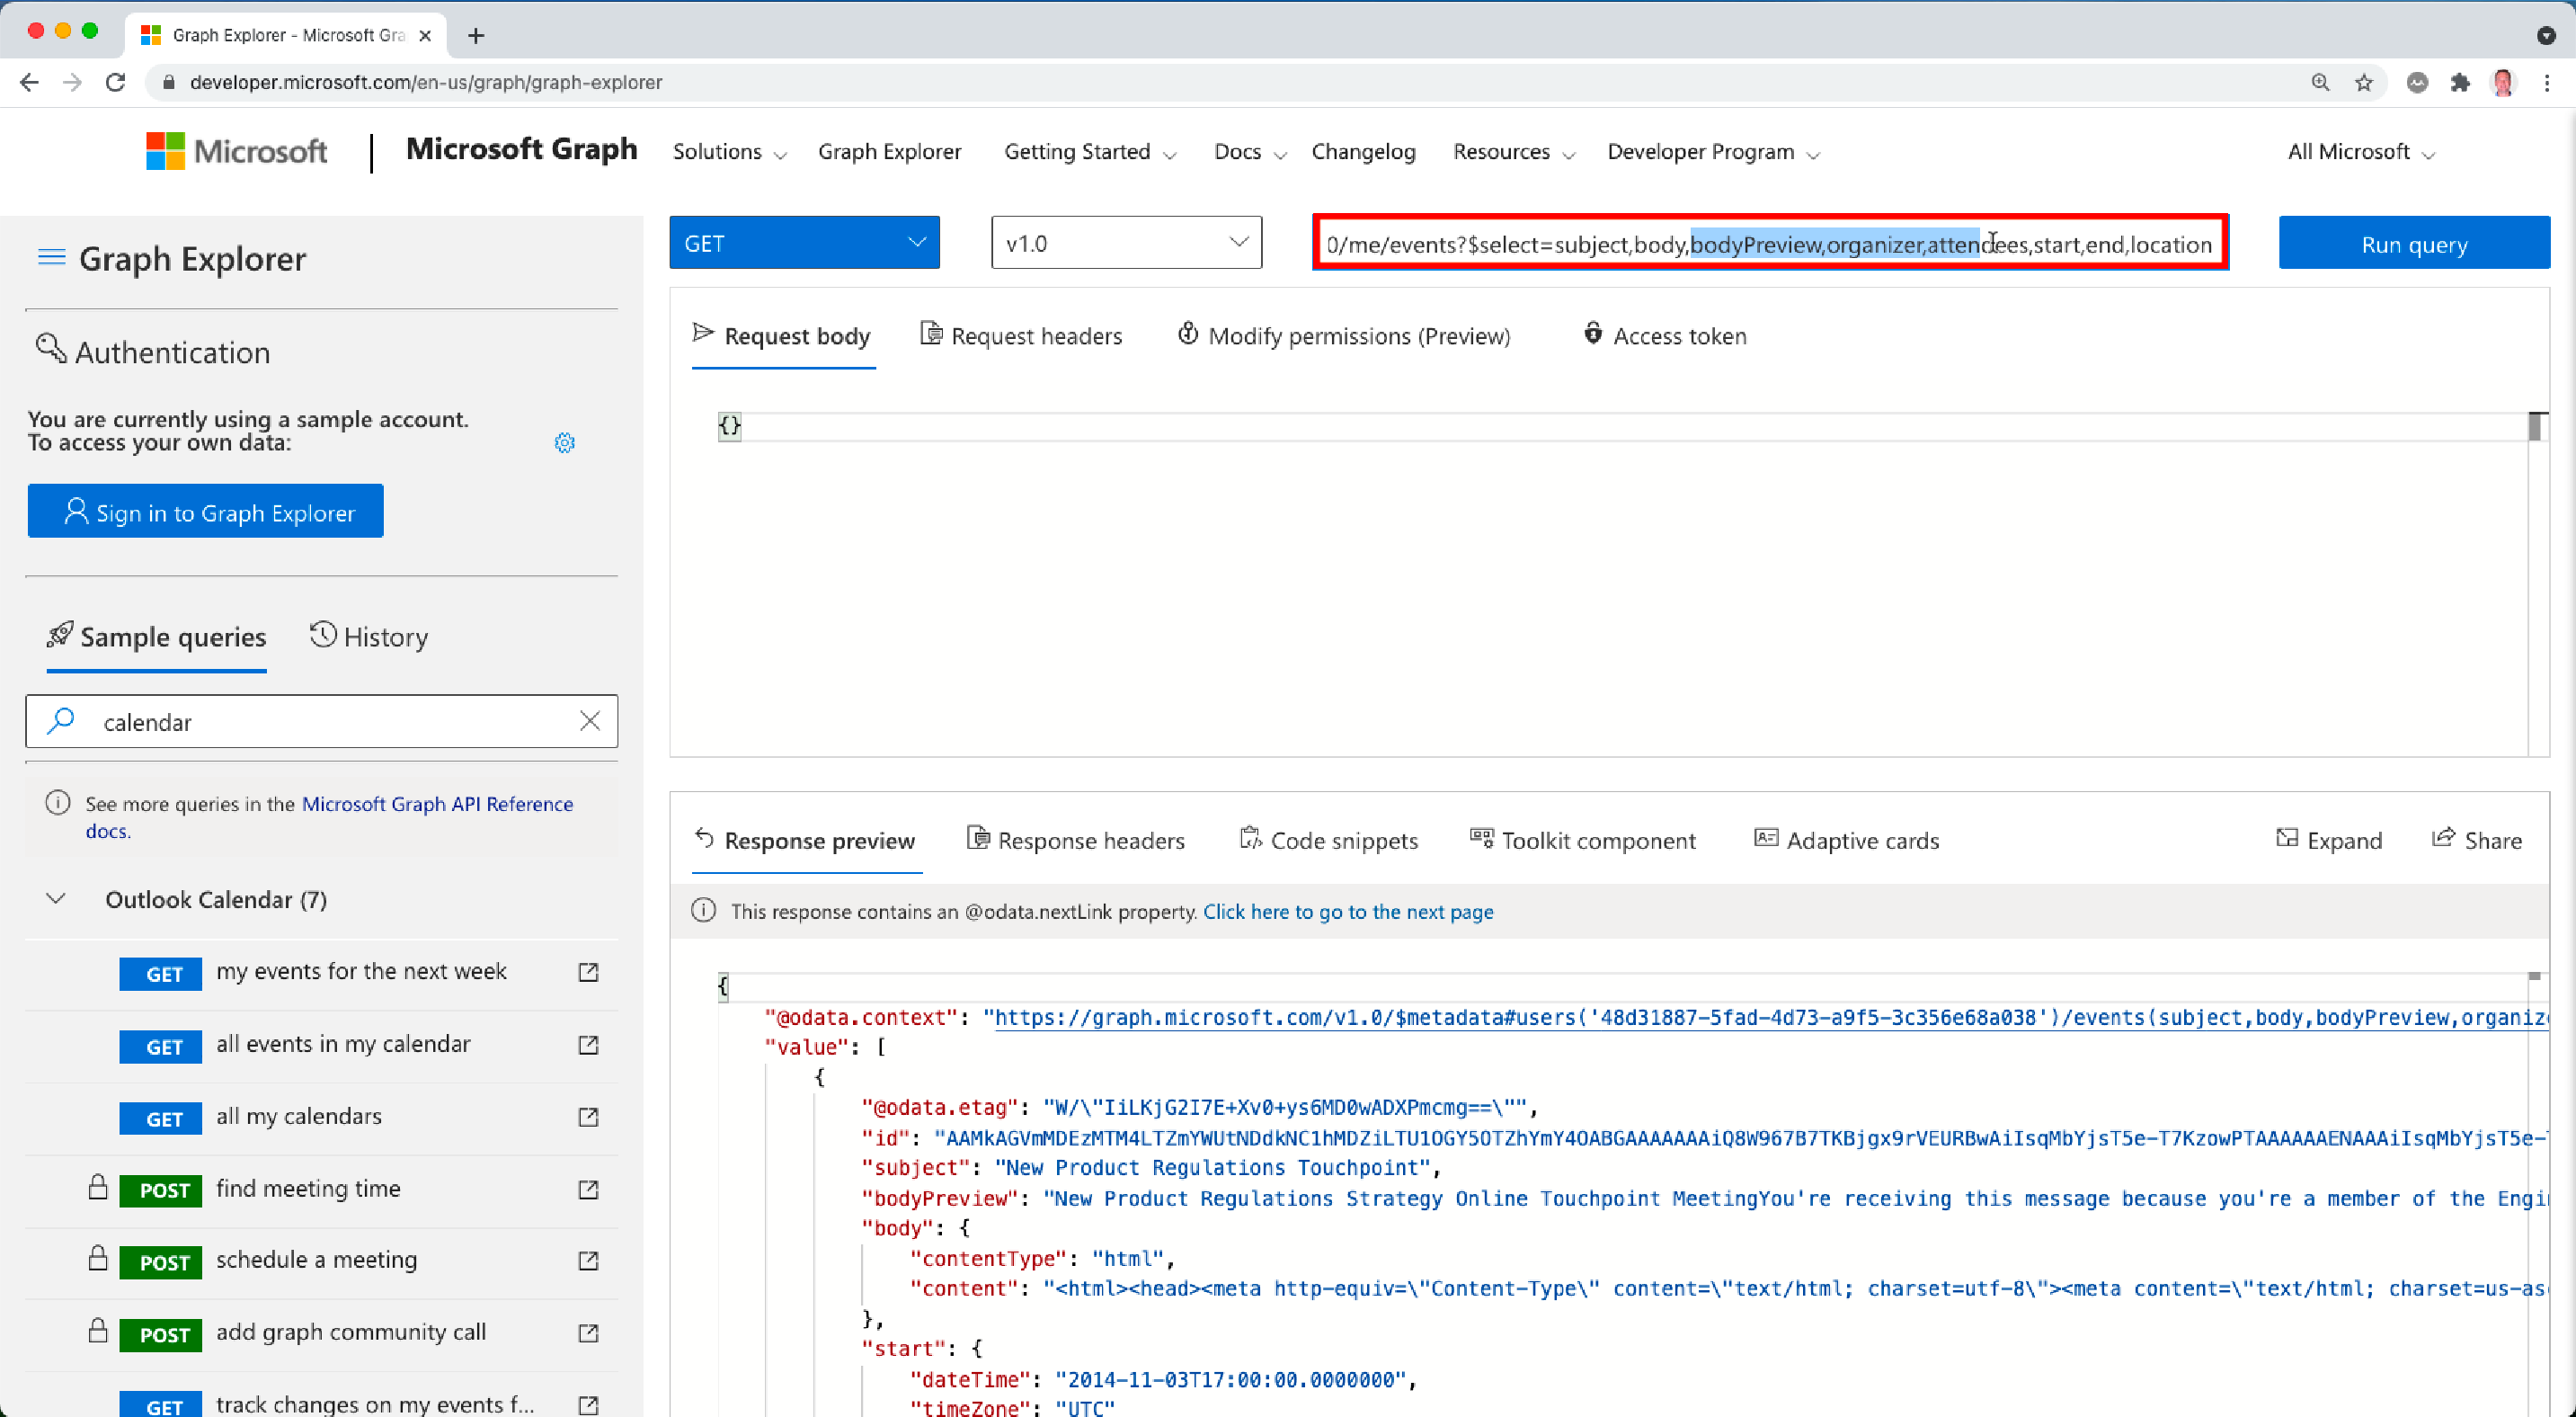
You can also retrieve calendar events and more. If you go the sample queries search box (lower left of the screen) and type “calendar” you’ll notice you can retrieve calendar events for the next week or all events. Maybe you want all upcoming events but only want to retrieve a limited amount of data about each event. If you click on the “all events in my calendar” query you can get that data. Looking at the JSON that’s returned you’ll see quite a bit of data displayed.
If you only want the subject, body, and maybe the start and the end dates, you can adjust that in the URL by deleting the properties you don’t want. The properties to return in the JSON data are controlled using the $select query parameter.
Now run the query and you’ll notice that only those properties are returned. You can also add different types of filtering if you’d like. You can add an & to the end of the URL and type $filter equals “your query here”. Or, you can grab something greater than a date, less than a date, etc. Here’s an example of using ge to grab calendar events greater than or equal to a specific date. Notice the use of the $filter query parameter.

After selecting Run query you’ll have the same data, but now it’s filtered and only the specific properties you selected are returned! Additional information about selecting, querying, sorting, and performing other types of operations can be found at https://aka.ms/msgraph-query-params.
Conclusion
I hope this helps you out as you get started using Microsoft Graph. If you’d like a more hands-on approach to using Graph Explorer and Microsoft Graph in general, check out the free Microsoft Graph Fundamentals learning path available at https://aka.ms/learn-graph.