

Have you ever tried to describe a UI bug to someone? “See that button… no, the OTHER button… the one with the blue border… well, it’s kind of blue… anyway, make it bigger.” It’s painful. Screenshots help, but then you’re copying and pasting them into chat windows and hoping your AI assistant understands which pixel you’re pointing at.
I got tired of this overall process and decided to build a tool called ZingIt that lets you point at elements on a webpage, mark them with notes, and send them directly to AI for automatic fixes. No more describing. No more screenshots flying around. Just Point → Click → Describe → ZingIt to AI. If you’ve ever used frame.io before (which provided some of the inspiration - more on that later), you’ll know you can click on a timeline, add a marker, and then add your comments. Similar concept here except you can add comments about the UI and then hand them off to AI!
I couldn’t have built it without the GitHub Copilot SDK. The SDK turned what would have been a complex, messy integration into something surprisingly elegant. Let me walk you through what ZingIt does and how the SDK made it possible.
ZingIt in Action
The idea is simple, you’re running your app locally in development. You spot something that needs changing in the browser. Maybe a typo in a heading, maybe a button that needs a different color, maybe some padding that’s off. Instead of switching to your code editor and hunting for the right file, you:
-
Press Z to enter ZingIt’s mark mode. That displays the ZingIt toolbar.
-
Select the element or elements to modify
-
Type your instructions: “Make this heading blue” or “Increase padding to 24px” or “create a blue linear gradient”
-
Click the sparkle icon (✨) in the ZingIt toolbar
-
Watch the AI find the code and make the change
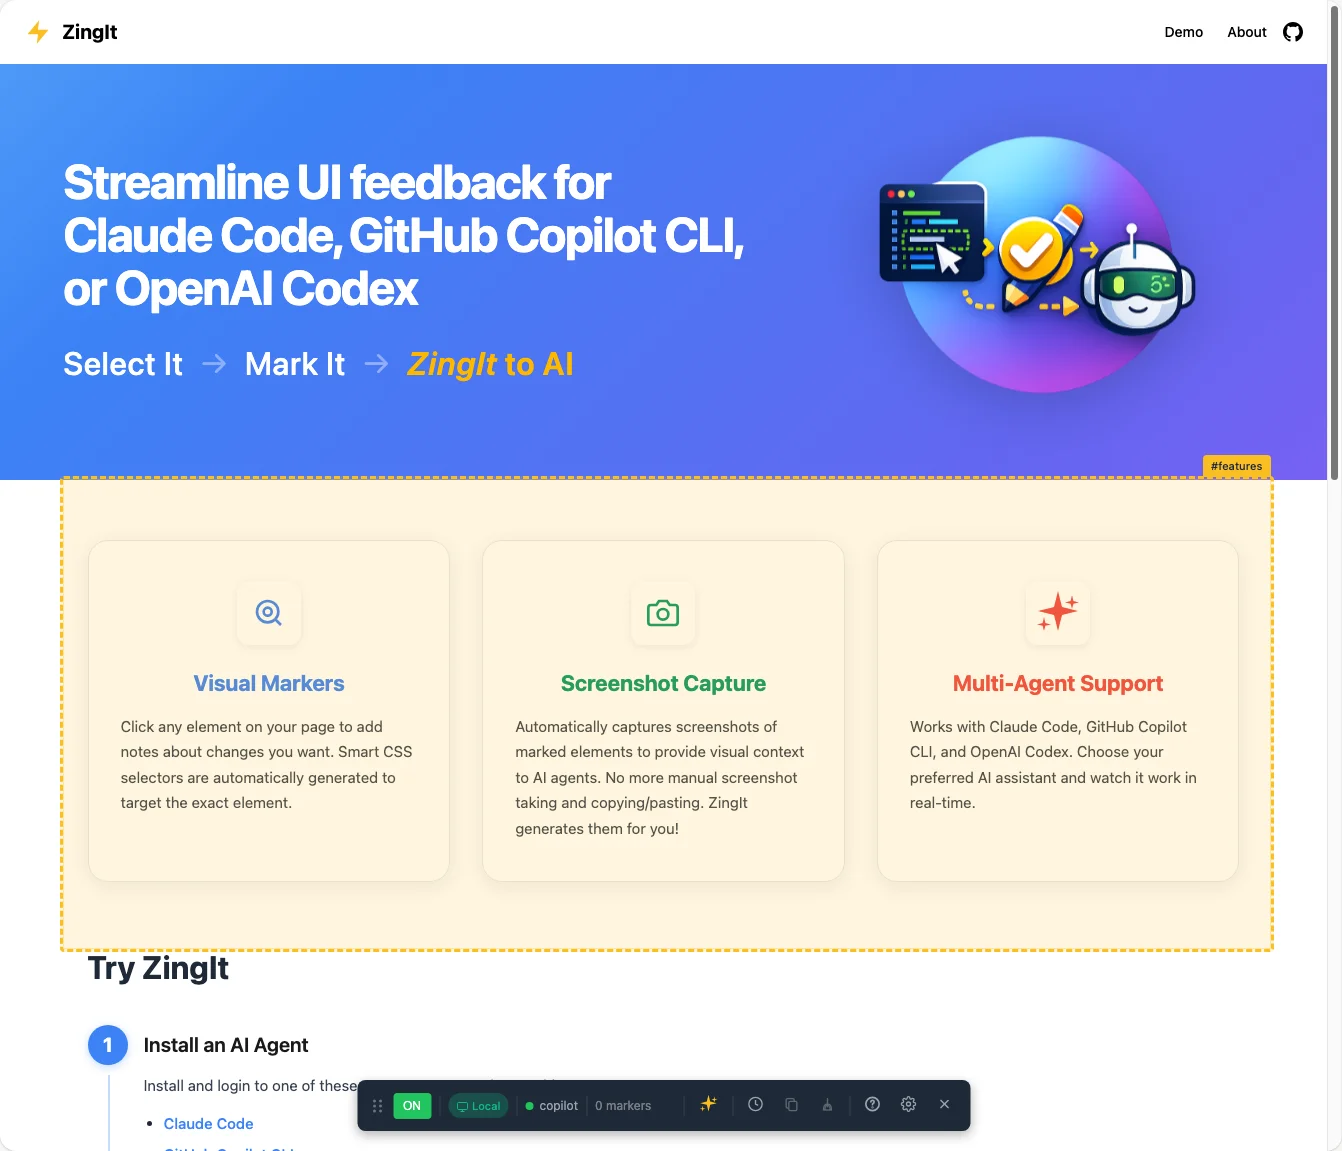
Using ZingIt to select the element you’d like to change. You’ll see the ZingIt toolbar at the bottom of the page.
That’s it. The AI gets the CSS selector, the HTML context, a screenshot of the element (if you choose), and your instructions. It searches your codebase, finds the right file, and makes the edit.
All you have to do is select the element, type in what you want to do, take an optional screenshot of the element by checking a checkbox, saving the “marker”, and then clicking the ✨ icon to kick off the AI process.
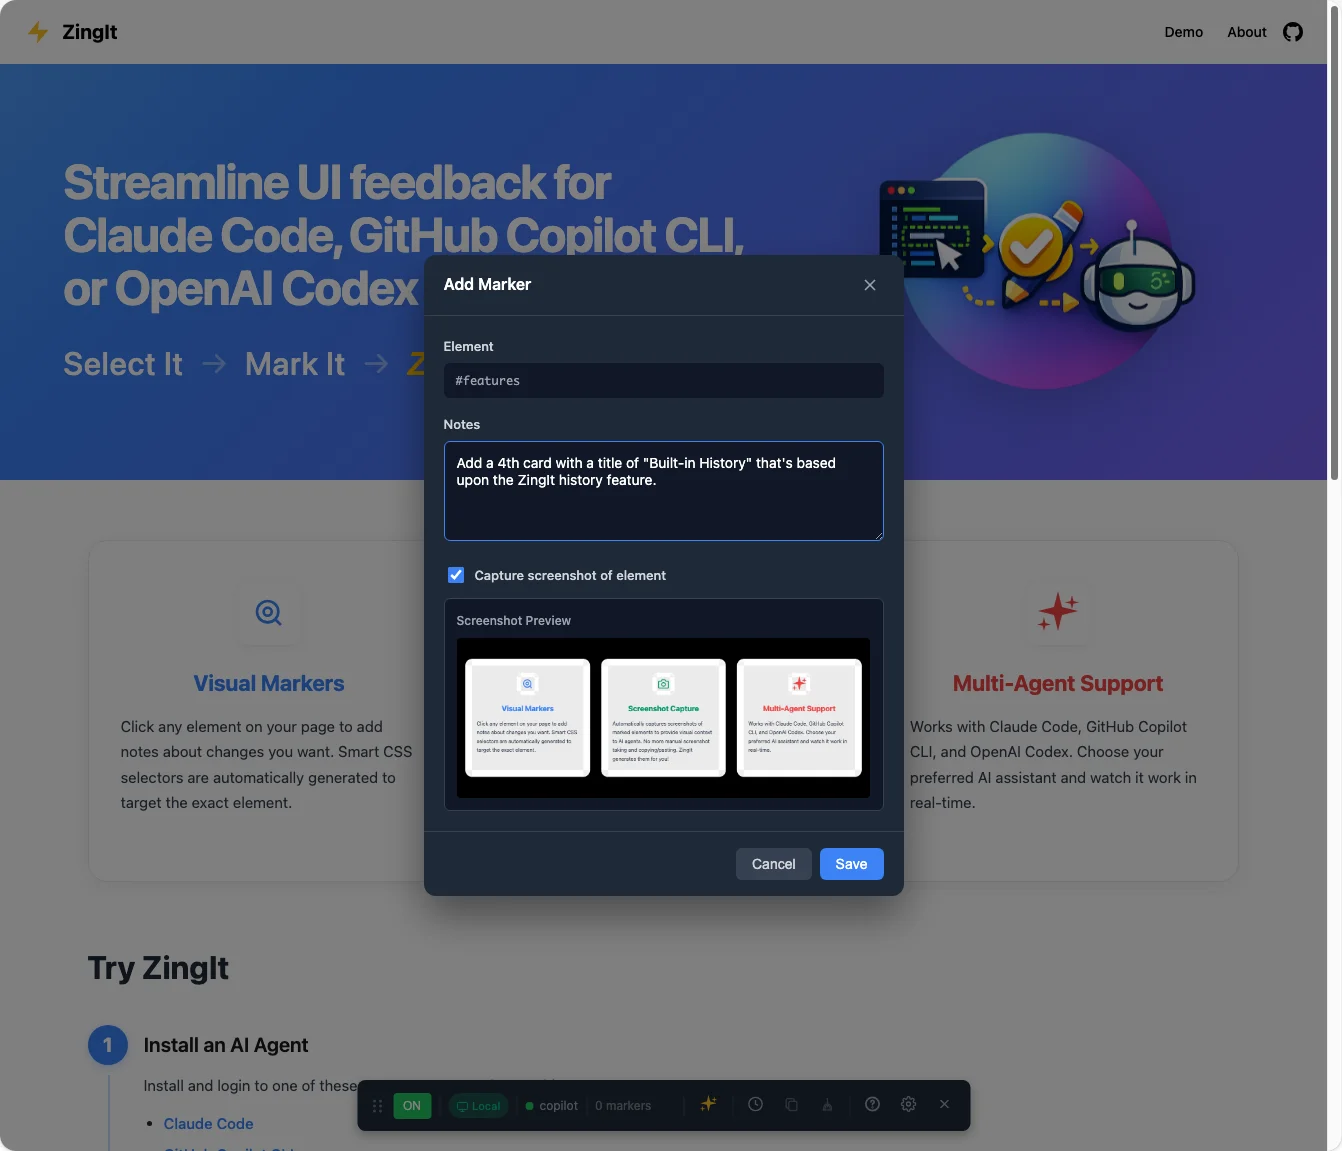
Adding a marker with notes and screenshot preview
Multi-Agent Support
ZingIt doesn’t lock you into one AI assistant. It supports three major coding agents:
-
Claude Code
-
GitHub Copilot CLI
-
OpenAI Codex
You pick your agent when you connect, and ZingIt handles the rest. This type of choice was important to me because different developers have different AI subscriptions, and I didn’t want to force anyone into a specific ecosystem (although I highly recommend you check out GitHub Copilot CLI!). While it currently support the 3 AI assistants mentioned above, it’s certainly possible to extend it even further and add more in the future.
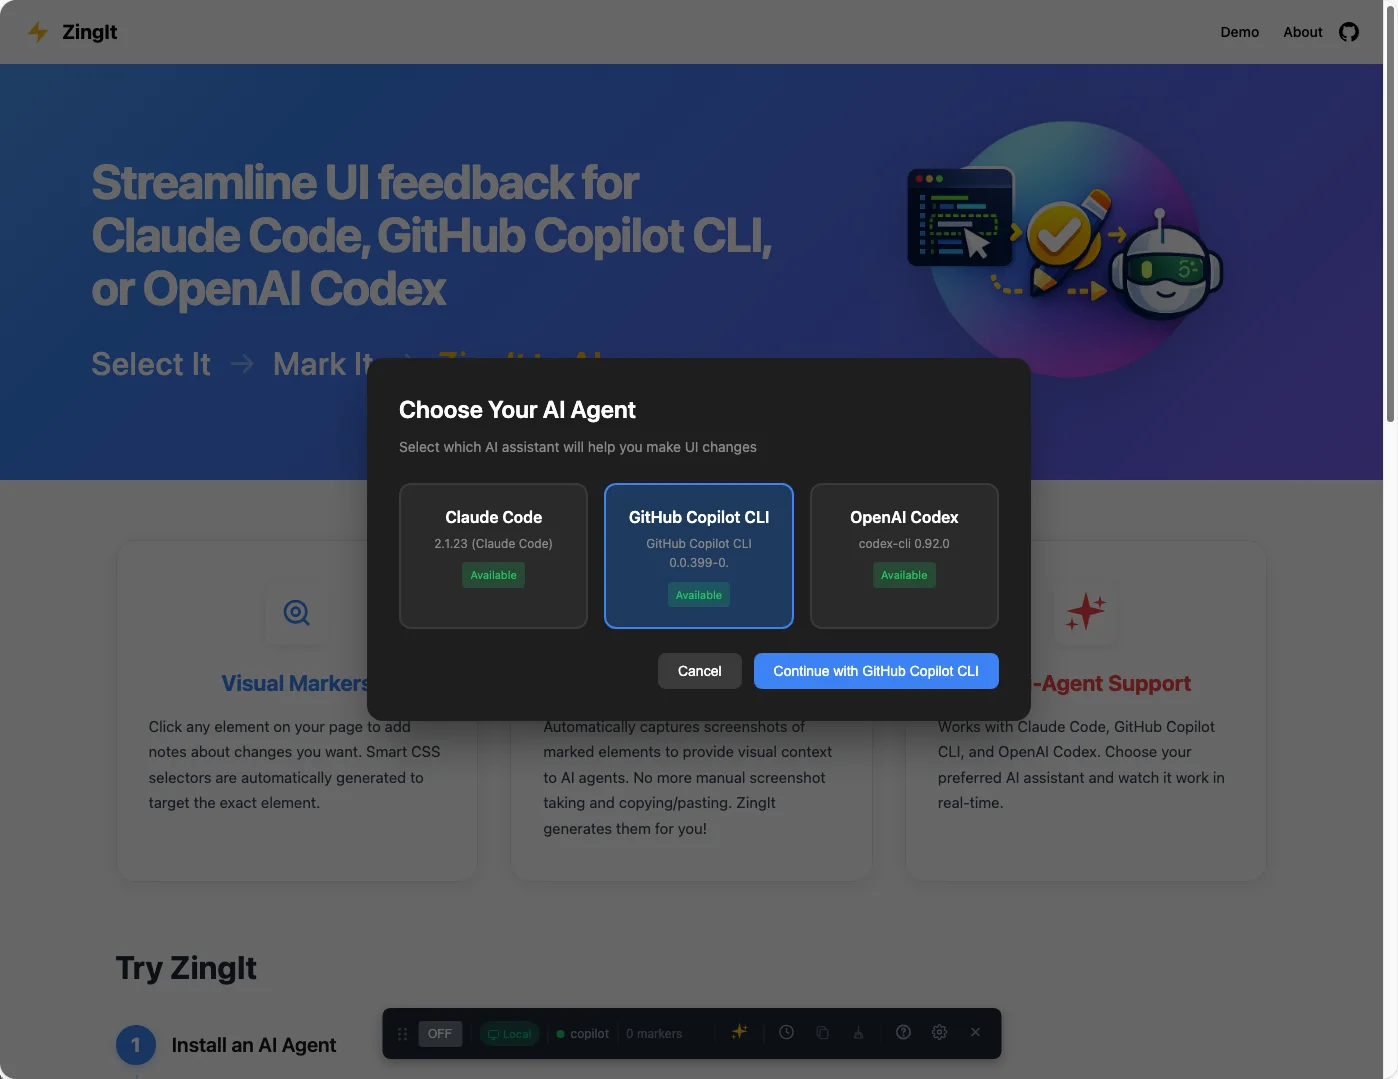
Choose your AI agent: Claude Code, GitHub Copilot CLI, or OpenAI Codex
The GitHub Copilot SDK: The Lightbulb Moment
I’d been thinking about this problem for quite a while. Over the 2025 holiday break I was asked to help review a new commercial that was being created and used frame.io to add “markers” and comments. Then video editors would act upon those and update the video.

That got me thinking, “What if we could do something similar for the UI, but then have AI kick in and help?”.
Of course, if a task was fairly straightforward I’d find the file and make the modification myself of course (yes - I still code), but often times it was more involved and I wanted the AI assistant’s help. But, that meant that every time I wanted to make a UI change, I’d go through the same tedious routine I mentioned earlier: type out a detailed prompt describing the element, take a screenshot when needed, paste it in, hope the AI understood which thing I was pointing at. It worked, but it was slow and clunky.
When the GitHub Copilot SDK came out, I started digging into what it could do. Session management, streaming, image attachments, permission handling, and more. That’s when I had the “lightbulb moment” and realized I could build something that captures all that context automatically and sends it directly to the AI. No more manual screenshots. No more verbose descriptions. Just point at the thing and tell it what you want done.
So, the Copilot SDK is what actually turned a major pain point into a workable solution for me. Once I got it working, I decided to add support for Claude Code and OpenAI Codex as well since they also have SDKs.
Here’s what the SDK gives you out of the box:
-
Session management: Create, resume, and destroy sessions cleanly
-
Streaming responses: Watch the AI work in real-time
-
Permission handling: Control what the AI can read and write
-
Image attachments: Send screenshots alongside your prompts
-
Auto-restart: Handle disconnects gracefully
How It All Fits Together
Before diving into some code, here’s a quick look at how ZingIt works:
-
Browser: You mark elements on your page. ZingIt captures the selector, HTML context, and a screenshot. The idea for that came from working on projects that used frame.io which lets you add comments at specific points in a video.
-
WebSocket: The browser sends that data through a WebSocket to a Node.js server running locally.
-
Copilot SDK: The Node server hands everything off to the Copilot SDK, which talks to the AI, streams responses back, and executes file edits.
-
Back to the browser: The server relays the AI’s progress over the WebSocket so you can watch it work in real-time.
The SDK handles the hard part: communicating with the AI, managing sessions, and streaming responses. The WebSocket layer just shuttles messages between your browser and the SDK.
Let me walk you through how ZingIt uses these features.
Initializing the Client
Setting up the Copilot client is really simple. Create a new CopilotClient instance and you’re off and running.
import { CopilotClient } from '@github/copilot-sdk';

export class CopilotAgent extends BaseAgent {
  name = 'copilot';
  model: string;
  private client: CopilotClient | null = null;

  constructor() {
    super();
    this.model = process.env.COPILOT_MODEL || 'claude-sonnet-4-20250514';
  }

  async start(): Promise<void> {
    this.client = new CopilotClient({
      logLevel: 'info',
      autoRestart: true,  // Handles disconnects gracefully
    });

    await this.client.start();
    console.log(`✓ Copilot SDK initialized (model: ${this.model})`);
  }
}
The autoRestart: true option is a lifesaver. In a tool like ZingIt where users might step away mid-session, having the SDK automatically handle reconnection means fewer error states to manage.
Creating Sessions with Context
When a user connects from ZingIt’s browser UI, we create a session with all the context the AI needs:
async createSession(wsRef: WebSocketRef, projectDir: string,
                    resumeSessionId?: string): Promise<AgentSession> {
  const sessionConfig = {
    model: this.model,
    streaming: true,
    systemMessage: {
      mode: 'append' as const,
      content: `
        You are a UI debugging assistant working in the project directory: ${projectDir}

        When given markers about UI elements:
        1. Search for the corresponding code using the selectors and HTML context provided
        2. Make the requested changes in the project at ${projectDir}
        3. Be thorough in finding the right files and making precise edits

        When screenshots are provided, use them to:
        - Better understand the visual context and styling of the elements
        - Identify the exact appearance that needs to be changed
        - Verify you're targeting the correct element based on its visual representation
      `
    },
    onPermissionRequest: async (request: any) => {
      // Auto-approve read/write operations for file edits
      if (request.kind === 'read' || request.kind === 'write') {
        return { kind: 'approved' as const };
      }
      return { kind: 'approved' as const };
    },
  };

  // Resume existing session if we have a sessionId, otherwise create new
  const session = resumeSessionId
    ? await this.client.resumeSession(resumeSessionId, sessionConfig)
    : await this.client.createSession(sessionConfig);
Two things worth highlighting here aside from the prompt:
Session resumption: If a user’s WebSocket disconnects and reconnects (happens more than you’d think), we can resume right where we left off instead of starting fresh. The AI remembers the conversation context.
Permission handling: The onPermissionRequest callback lets you control what the AI can do. For ZingIt, we auto-approve file reads and writes since that’s the whole point. In other scenarios, you might want to prompt the user for approval.
Streaming Events to the Browser
ZingIt shows real-time progress as the AI works. The SDK’s event system makes this straightforward and the ZingIt agent panel displays the agent messages that are received by the browser.
const unsubscribe = session.on((event) => {
  switch (event.type) {
    case 'assistant.message_delta':
      // Streaming chunk - send to browser
      send({ type: 'delta', content: event.data.deltaContent });
      break;

    case 'tool.execution_start':
      console.log('[Copilot Agent] Tool executing:', event.data.toolName);
      send({ type: 'tool_start', tool: event.data.toolName });
      break;

    case 'tool.execution_complete':
      send({ type: 'tool_end', tool: event.data.toolCallId });
      break;

    case 'session.idle':
      // AI finished working
      send({ type: 'idle' });
      break;

    case 'session.error':
      send({ type: 'error', message: event.data.message });
      break;
  }
});
This event-driven approach means the browser UI can show exactly what’s happening: “Searching files…”, “Editing src/components/Header.tsx…”, “Done!” Users aren’t left wondering if something froze.
Sending Screenshots with Prompts
Here’s where it gets interesting. ZingIt captures screenshots of the marked elements and sends them alongside the text prompt. The SDK handles this via file attachments:
send: async (msg: { prompt: string; images?: ImageContent[] }) => {
  const attachments: Array<{ type: 'file'; path: string; displayName?: string }> = [];

  if (msg.images && msg.images.length > 0) {
    const tempDir = os.tmpdir();

    for (let i = 0; i < msg.images.length; i++) {
      const img = msg.images[i];
      const ext = img.mediaType.split('/')[1] || 'png';
      const tempPath = path.join(tempDir, `zingit-screenshot-${randomUUID()}.${ext}`);

      // Decode base64 and save to temp file
      const buffer = Buffer.from(img.base64, 'base64');
      await fs.writeFile(tempPath, buffer, { mode: 0o600 });

      attachments.push({
        type: 'file',
        path: tempPath,
        displayName: img.label || `Screenshot ${i + 1}`
      });
    }
  }

  await session.sendAndWait({
    prompt: msg.prompt,
    attachments: attachments.length > 0 ? attachments : undefined
  });
}
The displayName option is a nice touch. It lets the AI know what each screenshot represents (“Screenshot of Marker 1: button.primary”) instead of just seeing a generic filename.
As of today the tempfile is needed (that’s not the case with some other SDKs which let you work with base64 directly) but I’m hopeful that may change in the future. It’s not a big deal in this case since once a process completes the code cleans up tempfiles and this is all running on a single developer machine.
Why This Matters
The GitHub Copilot SDK abstracts away the hard parts of AI integration:
-
Authentication: Uses your existing GitHub Copilot CLI subscription
-
Model selection: Switch between Claude, GPT, and others through config
-
Streaming: Built-in support for real-time responses
-
Session persistence: Resume conversations without losing context
-
Multimodal input: Text and images in the same request
Without the SDK, ZingIt would have been a weekend hack that worked on my machine and probably nowhere else. With the SDK, it’s a tool that other developers can actually benefit from as well.
Try It Yourself
Try it out by visiting the link below and following the steps or check out the GitHub repo to access all the code behind ZingIt:
Website: https://danwahlin.github.io/zingit
Repo: https://github.com/DanWahlin/zingit
The Copilot SDK turned what I expected to be a multi-week integration into something I got running in an evening. A few days later with the help of GitHub Copilot CLI, ZingIt was released. It’s been a fun project to work on.
Found this helpful? Follow me for more AI dev tools content:
-
Twitter: @danwahlin
-
LinkedIn: Dan Wahlin
-
GitHub: DanWahlin